

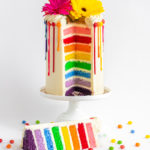
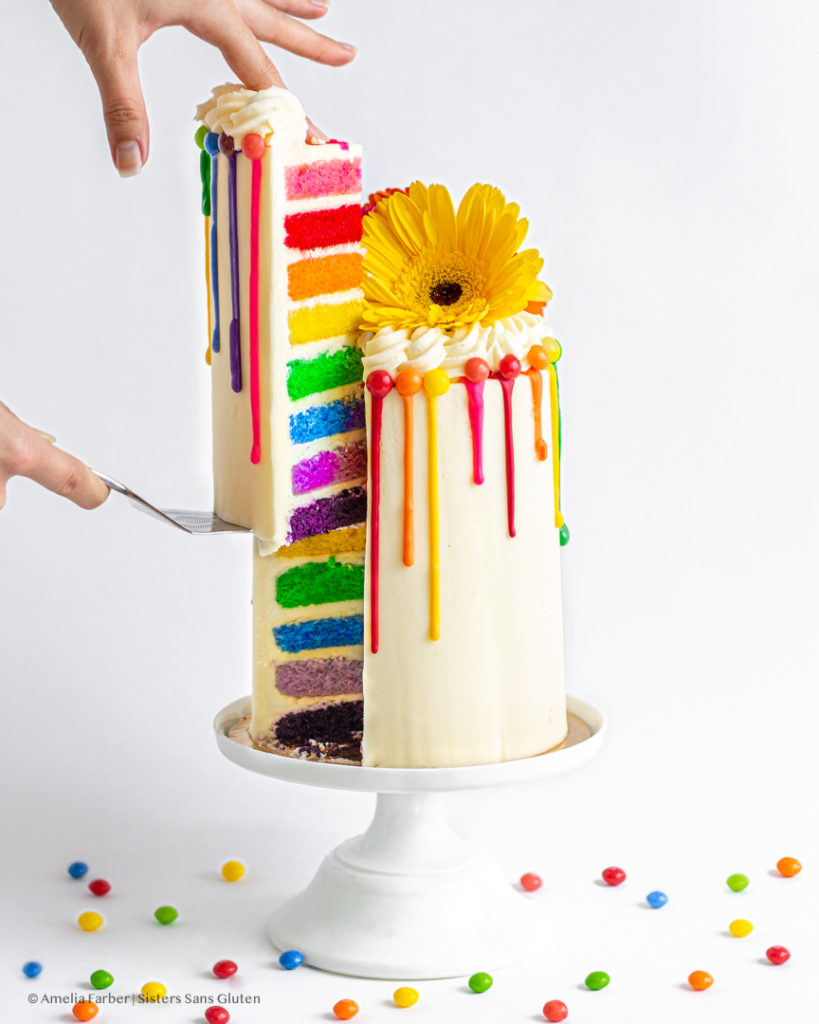
We are very very pleased to FINALLY present our very first actual rainbow pride cake!! It’s been a long time coming – mostly due to the fact that I was wildly intimidated to make a multi-layer, multi-colored cake and kept worrying that the colors would turn brown or not look great. But here we are, nearly the end of June with this fan-freaking-tastic EIGHT-layer gluten free Pride Cake, which not only boasts eight stunning colors, but eight stunning flavors as well. YES, you heard that right – to further embody the glorious array of everyone who celebrates who they are in all of our various colors, we wanted to add lots of flavors as well. We have a bright pink strawberry layer, a vibrant red cherry layer, a sunshiny lemon yellow layer, a striking green lime flavor, a velvety blue raspberry layer (throwback to jolly ranchers), a soft purple lavender layer, and a deep purple ube layer! SO many ways of being human and so many incredible flavors of cake in one towering stack!
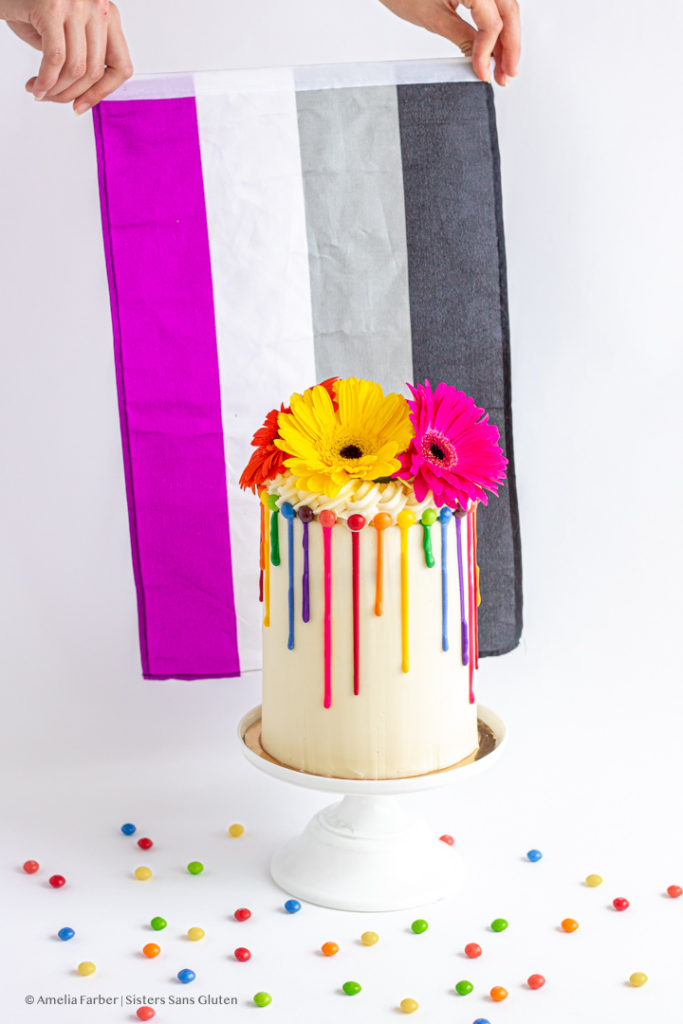
A huge shout out to Kendra, who’s hands are featured in the below photo, proudly holding her Pride Flag – the Asexual Community Pride Flag! She’s the best younger (taller) sister a girl could ask for, and I’m forever proud of her (big sis brag time). She’s crazy-hilarious, bold, strong-willed (the good kind of stubborn), and a brilliant business/joke/baking/and travel partner. Here’s to finally taking our long-overdue sister trip this fall after our 2020 plans were dashed. She also patiently puts up with my baking whims like the addition of a rainbow drip, flowers, AND skittles to this cake, and together we made the whole thing actually work! Next time, we’ll go for a Jackson Pollock splatter paint decor because, in all honesty, this rainbow drip was a taaaaaaad tricky. Totally doable though for those of you who want to! All instructions below!
Tips for this cake, because it may be a bit daunting, as it was for me before drafting the recipe:
- Use STRONG colors – and gel food coloring. We used oil-based gel colors for both the cake and the drip, through I would actually recommend using plain gel colors for the cake (water based I believe), and save the oil-based gel colors for the rainbow drip (you have to use oil-based color for a white-chocolate drip because regular colors don’t mix into chocolate/can cause it to seize).
- Use cake pan strips!! Seriously, get some now!! The biggest trick for the actual cake layers is making sure they’re 100% color and no brown from the baking, like cakes normally have around the edges and bottom. To do that, you need to use parchment paper on the bottom of the cake, and use cake pan strips around the cake pans themselves. Cake pan strips are thick adjustable pieces of fabric that fasten around the pan after you soak them in water for at least 10 minutes, and essentially sort of steam the cake sides so that they don’t brown at all and so that your cake rises evenly across the top (no doming, so nothing to cut off to make the cake flat!).
- Freeze your cake layers! This is a TALL cake – I mean, it’s eight freaking layers! So freezing your cake layers (either for a couple of hours or overnight), so that they’re solid will help. This will also make sure your cakes don’t break with you stack/handle them – since they’re very thin they’re also a bit fragile so freezing them makes them stronger. Constructing a cake with frozen cake layers will also help because it chills/sets the frosting immediately, adding needed structure to a tall cake as you build it.
If you’re looking for other treats to make to celebrate pride, check out our Trans Pride vanilla lavender layer cake (7 layers!), or these sprinkle cupcakes, or these sprinkle white chocolate cookies, or this ultimate sprinkle cake!
Gluten Free Rainbow Pride Cake
Equipment
- 4-8 six-inch round cake pans
- cake pan strips
- Parchment paper
- Electric mixer
- Piping bags and tips
- palette knife and cake scraper
- Plastic wrap
Ingredients
For the cake layers:
- 6 large egg whites no yolks!
- 1 1/4 Cup white sugar
- 3/4 Cup salted butter room temp
- 1/2 Cup sour cream
- 1 tsp clear vanilla extract
- 3/4 Cup buttermilk
- 1 1/2 Cup gluten free 1-1 flour mix with xanthan gum added if it doesn’t have xanthan gum, add 1 teaspoon xanthan gum
- 1/2 Cup sweet rice flour
- 1/2 Cup arrowroot starch
- 1 tsp baking soda
- 1 3/4 tsp baking powder
- 1/2 tsp salt
- red, orange, yellow, green, blue, purple gel food coloring
- 1-2.5 tsp each of strawberry, cherry, orange, lemon, lime, raspberry, and lavender extracts
- 1/2 tsp ube extract
For the buttercream:
- 4 Cups salted butter room temperature
- 6 oz cream cheese room temperature
- 6-7 Cups sifted powdered sugar
- 1 Tbsp clear vanilla extract
For the rainbow drip (optional):
- 110 grams good quality white chocolate chopped
- 5 grams cocoa butter
- red, orange, yellow, green, blue, purple gel oil based food coloring
For the topping:
- skittles
- flowers
Instructions
First, make the cake layers:
- First, preheat the oven too 350° Fahrenheit and start soaking your cake pan strips in a bowl of water. Then beat the egg whites in a medium bowl until stiff peaks form, and then set the bowl aside. In another large bowl, using the electric mixer again, cream the room temp butter and sugar until lighter and fluffy, about 3 minutes. Add in the sour cream, vanilla, and buttermilk and beat to combine. Then whisk in the gluten free flour mix, arrowroot starch, sweet rice flour, baking powder, baking soda, and salt until just combine (do not overmix). Finally, slowly fold in the egg whites until completely combined.
- Separate the cake batter evenly into 8 cereal bowls (I recommend using a measuring scoop to make sure each bowl gets the same amount of batter). Then add your colors and extracts! We did: pink layer (strawberry extract), red layer (cherry extract), orange layer (orange extract), yellow layer (lemon extract), green layer (lime extract), blue layer (raspberry extract), light purple layer (lavender extract), dark purple layer (ube extract – already has food coloring in it!). Slowly mix in the flavor and food color (start with just a drop or two and add more to your liking) into each bowl with a new spoon each time.
- Finally, fasten your soaked cake pan strips tightly around your pans – I only had four 6-inch pans so did two batches of four. Then grease each pan with cooking spray, add a small circle of parchment paper on the bottom, and respray that parchment. Then scoop in one bowl/color of batter into each pan and spread to cover the bottom of the pan (there will not be much batter in each pan – these are thin layers!). Bake for 20-25 minutes until the cakes spring back to the touch and then remove from the oven and let cool completely. If you're doing batches of cake layers, let the first ones cool, then turn out onto parchment paper, and re-soak the pan strips, re-grease the pans, and add more parchment paper.
- Once all the cakes are baked and cooled, wrap in plastic wrap and freeze for at least 90 minutes.
To make the buttercream:
- While the cakes are freezing, make the buttercream. In a large bowl, beat the salted butter until much lighter, about 4-5 minutes. Add two cups of the sifted powdered sugar and beat until smooth. Add the cream cheese and clear vanilla and beat to combine, then continue to add the sifted powdered sugar one cup at a time until the frosting is much thicker and smooth. If you want the frosting even thicker, keep adding more powdered sugar.
To construct the cake:
- Remove the cakes from the freezer and unwrap. Place the dark purple layer on the cake board or plate, and spread a thin layer of buttercream on it with a palette knife. Keep adding cake layers (light purple, blue, green, yellow, orange, red, pink), spreading buttercream in between. Then crumb coat the entire cake in more buttercream, and then freeze the entire cake for about 10 minutes before applying the final coat of frosting, smoothing it with your cake scraper.
- Then make your rainbow drip! Melt the chopped white chocolate and cocoa butter for 15 second intervals in the microwave, stirring in between, until it's fully melted and combined. Then spoon a small amount (about a teaspoon and a half) into seven small bowls. Add your pink, red, orange, yellow, green, blue, and purple oil-based gel food coloring to each bowl so you have a bit of the drip each color of the rainbow. Working quickly before the chocolate hardens, scrape each colored drip into a small piping back (7 piping bags total) or zip top baggie and, while the drip is still warm, snip the tip off of each bag and carefully apply one drip per color to the top edge of the cake. If the drip begins to cool in the bags, microwave the bags for 10-15 seconds.
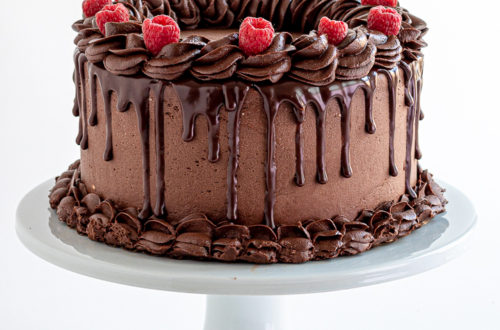
- Finally, pipe the remaining buttercream around the top of the cake, and add any skittles or flowers that you'd like! Keep the cake in the fridge until serving for easiest cutting (use a hot knife to cut the cake – heated with hot water or over a stove top flame).
Tag @sisterssansgluten on Instagram if you snap a photo of your cake!
Food photography and styling by Amelia Farber


2 Comments
Pingback:
Sean
Each layer was perfect! I loved the lavender!