
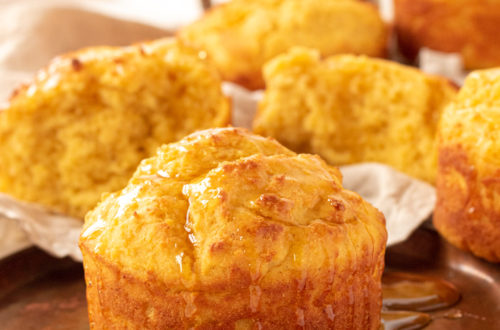
Welcome to summer at it’s best: thick with sweet summer fruit and perfect for those dusty July mornings when you want something a bit more breakfasty than an entire berry crisp or crumble: these GIANT gluten free blackberry nectarine streusel muffins. They’re packed with gluten free rolled oats, brown sugar, and heaps of that good fresh summer fruit, so essentially, a blackberry nectarine crisp in muffin form. These might, MIGHT, be my favorite giant muffin yet. For those of you wondering – “yet? what are these giant muffins? what’s the hype?” let me let you in on a giant secret: we recently became obsessed with recreating those glorious Costco muffins we used to be able to eat 17+ years ago and we’ve now gone over and beyond those staple Costco flavors and edged into realms of never-before-eaten giant muffins like these ones. So far we’ve made these giant poppyseed muffins, giant blueberry muffins, giant chocolate chip muffins, giant double chocolate muffins, giant banana nut muffins, giant strawberry rhubarb muffins, giant apple streusel muffins, these giant lemon raspberry muffins, giant cherry chocolate chip muffins, and giant coffee walnut muffins!
Tips for Fantastic Giant Muffins
A few tips for getting these to turn out just like you remember those Costco muffins:
- Use the right-size of pan! Apparently, Costco keeps their giant muffin pans as a trade secret because we can’t find them ANYWHERE on the internet and you can find EVERYTHING on the internet. Bravo, Costco, for a secret well-kept. However, we’ve found a way to crack the code and gone ahead and just used these brilliant 4-inch cake pans because, after careful inspection, we’ve discovered that Costco muffins are exactly 4-inches in diameter! HA! Take that, Costco-bakery-lords. I never thought I’d be regularly using 4-inch cake pans but here we are. I’ll just need to make a bunch of tiny cake recipes next!
- Let your batter REST, per the recipe, for at least 30 minutes. For two reasons: 1) the batter thickens as it rests which is incredibly important for a muffin filled with chunks of things like walnuts (even though walnuts are pretty light)! A thicker batter will help suspend all of the stuff you’ve added all throughout your muffins, ensuring every bite has the perfect ratio of fluffy muffin to add-ins; and 2) something somewhere said that baking powder needs a bit more time to “activate.” Don’t quote me on this, who knows if it’s actually true.
- Don’t over-mix your batter! Muffins need a lot of lift, especially these giant ones, and if you over-mix your batter, you’ll end up with flat or sunken muffins which is no fun.
- Use a good 1-1 gluten free flour mix! We use the Bob’s Red Mill one (the baking mix), though we’ve heard good things about Cup-4-Cup. We’ve only tested this recipe with this one so if you want them to turn out exactly like ours, we recommend snagging a bag of that specific 1-1 gluten free flour.
- Do NOT open the oven door during baking time. Tape it shut if you have to! You can certainly turn on the oven light and peek and the gloriousness that is a set of rising muffins nearly-ready to be devoured, but do not open that door! Opening the door will immediately lower the oven temp and prohibit your muffins from rising correctly. If you’re in the last few minutes of baking and need to test to see if they’re done, open the oven just a tiny bit and reach in and just tap the top of one – if it springs back it’s done, if it presses in like a foam mattress topper, it’s not and needs a couple more minutes!
- These will keep in an airtight container (or in ziplock baggies) for a week or so – and they freeze REALLY well! So if you want to make a batch and save a bunch, put them in a sturdy plastic container or a freezer plastic bag and pop them in there. Then microwave for about 30-45 seconds (from frozen) before eating! I even like popping mine in the microwave for 10-15 seconds from room temp to get them all warm and floofy again before eating.
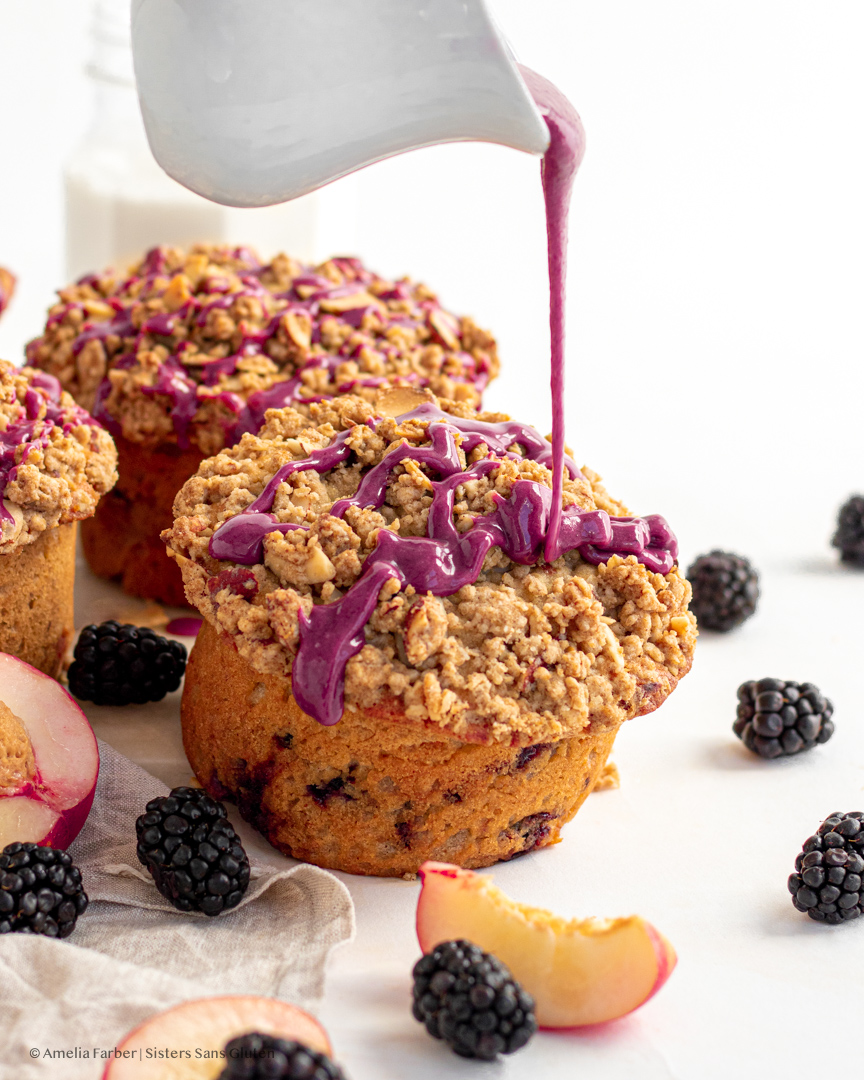
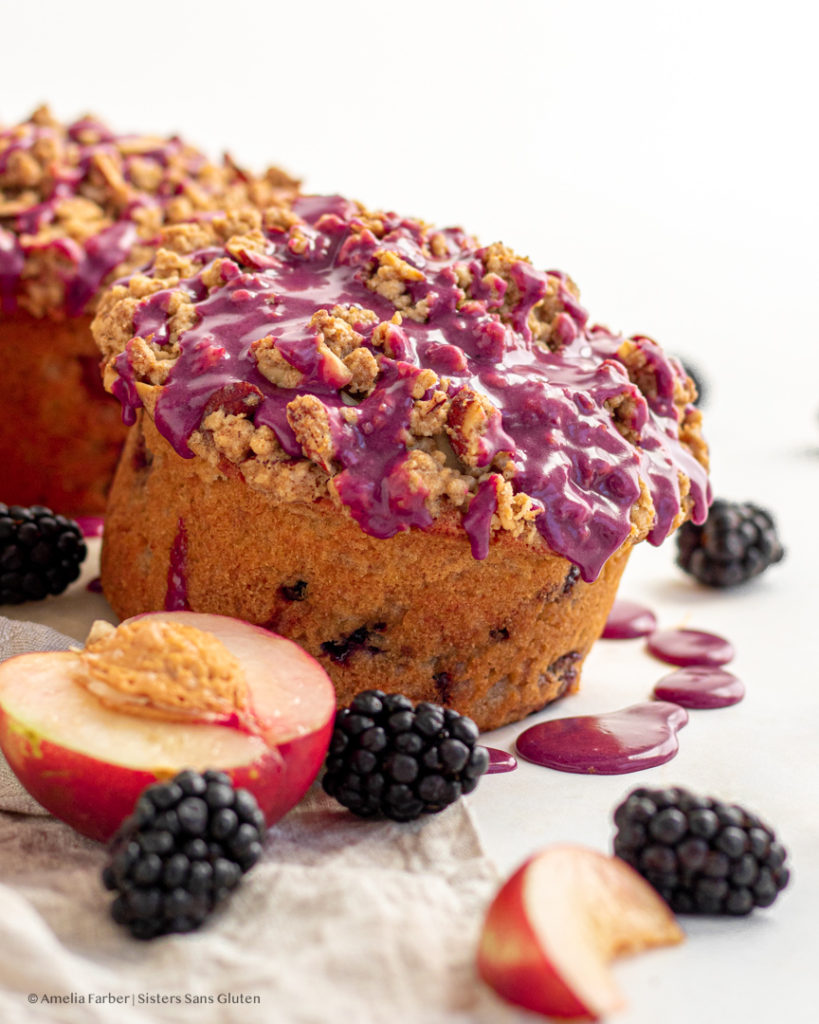
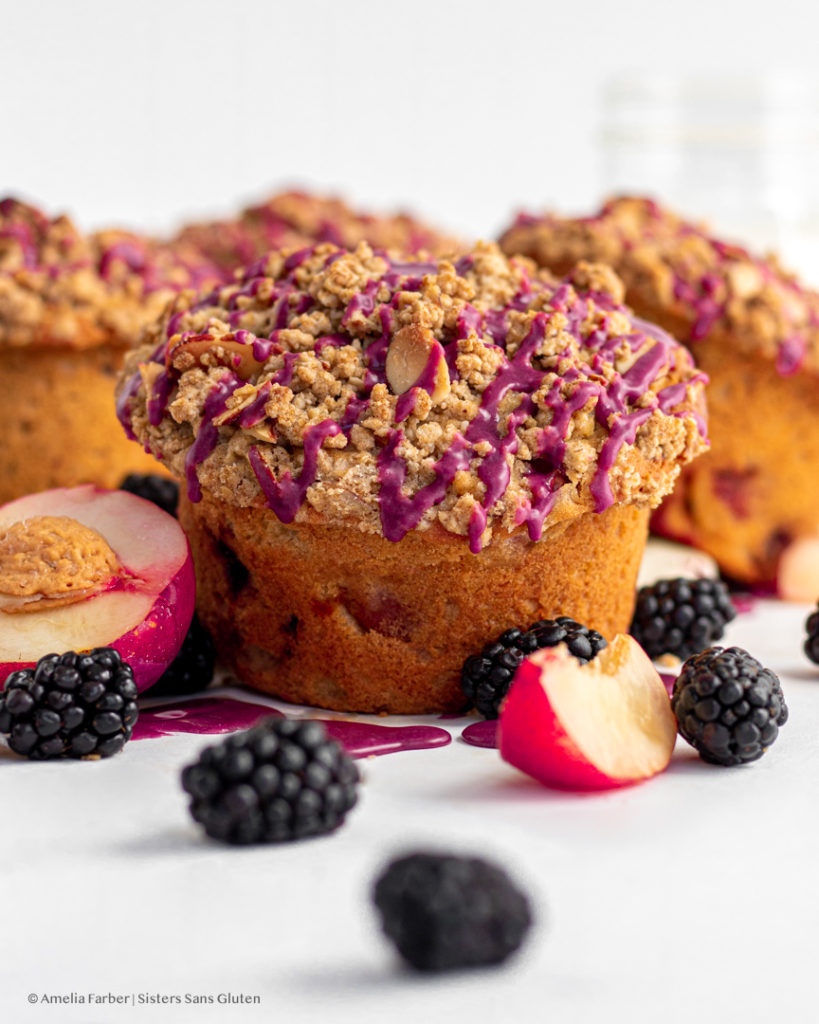
- STREUSEL: a good streusel is pretty dry so that it can crumble as you top your muffins and hold that crumbly shape. I’ve added both quick oats and sliced almonds to this crumble to mimic those heavenly summer fruit crisps, and the flavor is SO incredible. I recommend letting your streusel sit for about 30 minutes before topping your muffins (the muffin batter has to rest anyway so it works out well) so that the flour/oats can start to hydrate.
- GLAZE: glazes are a super easy way to elevate your muffin game. The glazes we use are essentially just powdered sugar and a liquid – in this case, a super-simple strained blackberry puree, plus some lemon juice and melted butter. The key with glazes is getting the consistency right – you want to be able to drizzle or pour the glaze, so it needs to be able to move a bit, but you don’t want it to just pour off your muffins completely. You want to get to a thicker consistency (it should be thick when you stir it), that slowly pours when you lift up your stirring spoon. This will ensure that your glaze stays mostly on top of the muffin and that it stays opaque and doesn’t run off in a giant puddle. If your glaze seems to thin and runny, just add more powdered sugar! Vice versa if it seems waaaay too thick and you can’t even get it to pour, add a touch more milk.
Giant Gluten Free Costco Copycat Blackberry Nectarine Crumble Muffins
Equipment
- Six 4-inch round cake pans (link below to the ones we use)
- Cookie sheet
Ingredients
For the crumble topping:
- 5 Tbsp salted butter melted
- 1/2 Cup plus 2 Tbsp gluten free 1-1 flour mix with xanthan gum added (if it doesn't have xanthan gum, add 1/8 teaspoon xanthan gum)
- 1/2 Cup quick cooking gluten free oats
- 1/4 Cup packed brown sugar
- 1/4 tsp ground cinnamon
- 1/4 tsp ground ginger
- pinch nutmeg
- pinch salt
- 1/8 tsp vanilla extract
- 1 Tbsp blanched almond flour
For the muffins:
- 4 large eggs
- 1 Cup white sugar
- 1/2 Cup packed brown sugar
- 1/2 Cup canola oil
- 1/2 Cup browned salted butter – start with 2/3 cup butter then brown it instructions below
- 1 Cup milk
- 1/2 Cup sour cream
- 3 tsp vanilla extract
- 2 Cups gluten free 1-1 flour mix with xanthan gum added (if it doesn't have xanthan gum, add 1 teaspoon xanthan gum)
- 1 1/2 Cups gluten free rolled oats not quick cooking
- 1/2 Cup packed blanched almond flour
- 1/4 Cup sweet rice flour
- 1/4 Cup arrowroot starch
- 1/4 tsp cinnamon
- 1/4 tsp ginger
- 1/8 tsp nutmeg
- 2 3/4 tsp baking powder
- 3/4 tsp salt
- 2 Cups fresh blackberries chopped in half
- 2 Cups chopped fresh nectarines 1/2 inch pieces
For the blackberry glaze:
- 1 1/4 Cup sifted powdered sugar
- 1/4 Cup strained fresh blackberry puree
- 1 tsp lemon juice
- 1 tsp melted salted butter
- pinch ginger, nutmeg, cinnamon, salt
Instructions
- First, make your browned butter! In a small saucepan over medium-low heat, melt the 2/3 cup of salted butter and stir constantly until melted and simmering. Continue to simmer, on medium heat, for at least a few minutes, until the popping and hissing sounds have completely subsided (this is the water in the butter burning off – you’ll know once it’s silent). Continue to cook, stirring constantly, until the butter reaches a deep amber color and smells nutty or caramelly. The butter may foam, so keep stirring/lifting up spoonfuls of the butter to see the color. The browned milk solids will foam up in the center of the pan – once it does that- immediately take off the burner and let sit for a few minutes, then pour (scrape ALL of the brown bits – that's the flavor!) into a heat-proof small bowl and let it cool to just above room temp (but not solid).
- While the browned butter is cooling, make the crumble topping. In a medium bowl, combine all of the crumble topping ingredients (the flour, quick oats, butter spices, brown sugar, vanilla, salt, almond flour), mixing together until all of the flour has been combined and there is no extra white/floury/oat bits. Then start crumbling the mixture into smaller chunks (1/4-1/2 inch chunks) and then let the crumble sit while you make the muffin batter.
- Then, make the muffin batter! It will need to rest at room temp for 30 minutes before baking. In a large bowl, whisk together the eggs, sugars, oil, melted but cooled browned butter (it should be about 1/2 cup now), milk, sour cream, and vanilla extract until thicker and smooth. Add in the gluten free 1-1 flour, gluten free rolled oats, gluten free sweet rice flour, arrowroot starch, almond flour, spices, baking powder, and salt and whisk until totally combined and smooth. Then fold in the chopped blackberries and nectarines (no need to peel them) then let the batter sit either on the counter for at least 30 minutes before baking (you can let it rest in the fridge for longer if you want).
- Once the batter has rested preheat the oven to 425° Fahrenheit and place your six 4-inch cake pans on a cookie sheet. Spray each pan with cooking spray, then spoon batter into each one evenly (they should be about 3/4-5/6 full) and then top each muffin with a generous amount of the crumble topping – completely covering each muffin. Bake for 5 minutes at 425 then immediately lower the temp to 350° F (do NOT open the oven door!) and let bake for 35-40 more minutes until the tops spring back with touched. Let cool nearly-completely before turning out.
- Once the muffins are nearly-cooled and have been turned out (carefully or all the topping will crumble off!) onto a tray or plate, make your glaze! In a smaller bowl, stir together all of the glaze ingredients with a table spoon until you reach the right consistency. You're looking for fairly thick glaze that you can still pour or drizzle but that pours slowly so that it will stay on top of the muffins and not run off. If the glaze is too thick, add a touch more liquid like lemon juice or blackberry puree (strained); if it's too thin, add more sifted powdered sugar. Then drizzle the glaze generously over the top of each muffin, and then serve!
- You can let the glazed muffins sit at room temp for 30-45 minutes for the glaze to harden, then put into zip-top bags and keep in the fridge or freezer for up to a week. Best-served slightly warm, so pop them in the microwave for 10-20 seconds from room temp!
Tag @sisterssansgluten on Instagram if you snap a photo of your muffins!
Food photography and styling by Amelia Farber


2 Comments
Tristan
Some of the best muffins – they taste just like a berry crisp/cobbler/crumble!!
Alene
You are dangerous! Lol!