
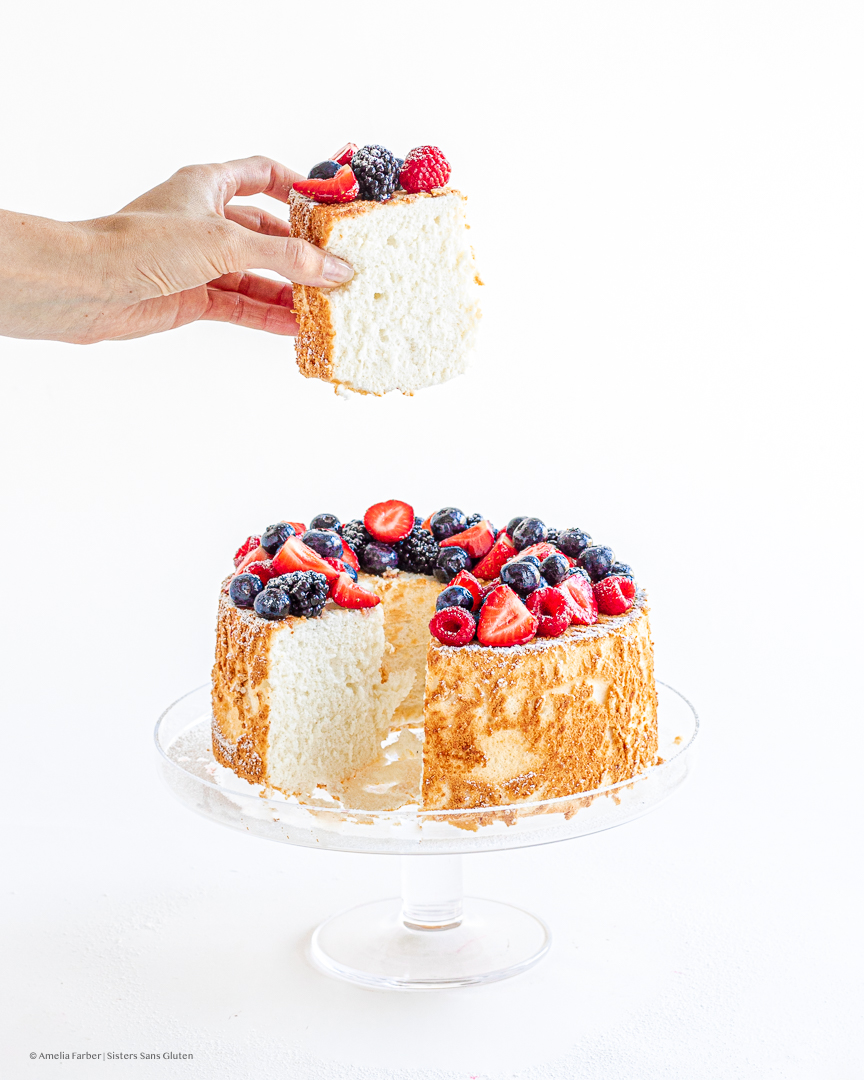
Anyone else remember the little filled-in-donut shortcakes they sold in American grocery stories, stacked amid clamshells of summer strawberries and spray cans of whipped cream? Thinking back, I don’t think they were actually angel food cake, but I always sort of thought they were, and a personal angel food cake blew my mind. Angel food cake has always been a favorite. But a favorite in the sense that I’ve only actually eaten it a handful of times and always considered it too ethereal, hard to make, and special to ever consider having for every birthday, holiday, or weekend. Which, I now realize, was a HUGE mistake. Because I LOVE angel food cake. You can rip off a hunk of the lighter-than-air sponge and eat it while walking! It’s like cotton candy in cake form, but doesn’t disappear as fast! It’s perfectly pillowy and has just a hint of almond extract which is just divine.
So, when I was making a decision about what new cake pan I should treat myself to, an angel food cake pan was not top of mind, but as soon as I saw it, I knew it was the one. A week later and here I am, sitting at the kitchen table, drinking my second glass of wine and stress-eating the most gloriously fluffy slices of my very own homemade angel food cake because this election is driving me NUTS, and only a couple of my human rights are at risk! (heads up, there are millions who are at risk of losing nearly all of theirs). Here’s hoping we wake up to a brighter future, and a few last slices of angel food cake to celebrate with.
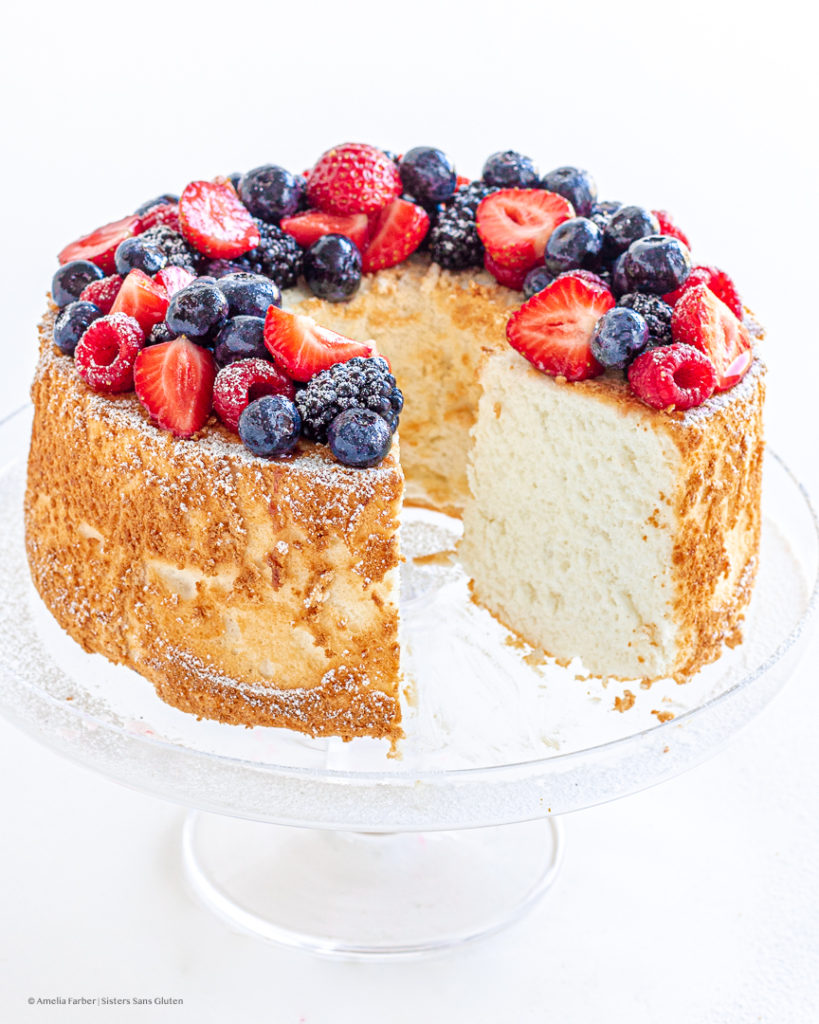
On a lighter note (literally), making angel food cake is pretty darn easy! As long as you have about 15 minutes of patience to whip up an entire dozen of room temp egg whites and then wait another few hours while your cake cloud cools upside down to preserve it’s voluminous height, you’re good to go! I even threw in a recipe for glazed berries and easy peasy whipped cream because honestly, we all need some homemade comfort food. So here’s to making your favorite comfort foods, or picking them up from the restaurant across the street, whatever you have the time for. If you’re into light, billowy desserts, try our mini cinnamon roll pavlovas, or these fluffy almond flour pancakes, or this Black Lives Matter berries and cream Swiss roll, or these hi hat chocolate cupcakes topped with marshmallow fluff!
Tips for getting the best angel food cake:
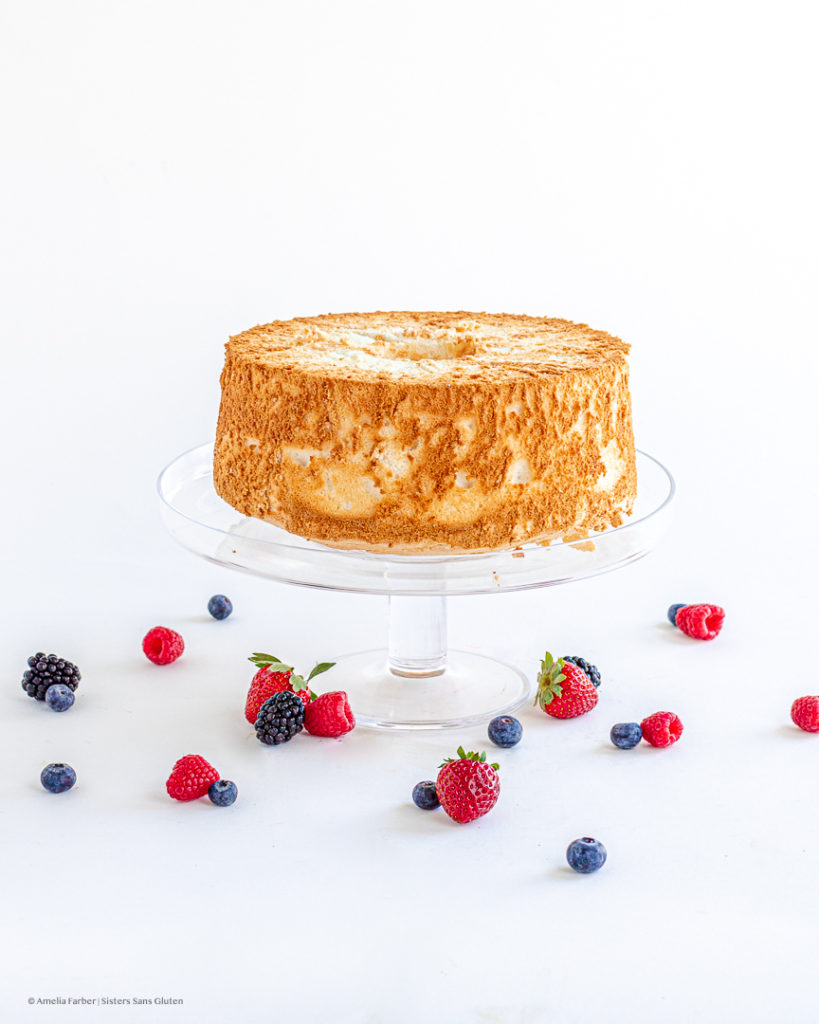
- Do NOT USE A NONSTICK PAN. Repeat: DO NOT USE A NONSTICK PAN. If you see anything labeled an angel food cake pan but also says it’s nonstick, it’s not actually an angel food cake pan. It’s a pretender and should be shunned. The correct pan (link HERE to the correct pan) to use is a tall tube pan (at least 5 inches in pan height) with a loose bottom, NO non-stick coating, and with three or four prongs or “feet” around the top edge of the pan. Why? Angel food cake is all about height: that’s what gives it the famous fluffy, cloud-like texture. To get that height, you need to let the cake cool UPSIDE DOWN for at least a couple of hours. The cake will settle into it’s final form out of the oven as it cools, and if you cool it right side up, it’ll just settle back down on itself and you’ve now wasted an entire morning making a normal-person food cake because none of that angelic floof is there anymore. When you cool it upside down (using those handy prongs/feet to stand the pan on so your cake doesn’t smoosh against the counter), it preserves all of that height, floof, and texture you worked so hard to get.
- Follow the instructions TO THE LETTER. This means no dumping in all the sugar at once because you’re impatient. If you’re that impatient, don’t bother making an angel food cake today, make some no-rest cookies or a simple layer cake or something because you need to commit to this cake to make it work. Angel food cake is ultimately pretty dang easy, but only if you actually follow the instructions. If you dump everything in at once, all the air in the egg whites just immediately goes away and you’ll end up with a disappointing 2-inch angel food cake pancake that isn’t cloud-like at all.
- Go slow and steady – this is a great cake to make while scrolling through IG on your phone (while you hold the electric mixer in the other hand), or while listening to a great playlist or a podcast. It honestly doesn’t take THAT long to make, but you do need to not rush it.

Gluten Free Angel Food Cake with Glazed Berries and Cream
Equipment
- 10-inch Angel Food Cake Pan (tube pan)
- Electric mixer
- Small saucepan
- Sieve
Ingredients
For the angel food cake:
- 1 1/2 Cups white sugar
- 1 Cup gluten free 1-1 flour mix with xanthan gum added (if it doesn't have xanthan gum, add 1/2 teaspoon xanthan gum)
- 2 Tbsp sweet rice flour
- 1/2 tsp salt
- 12 large room temperature egg whites (no bits of yolk, or they won't whip!)
- 1 1/2 tsp cream of tartar
- 1 1/2 tsp vanilla extract
- 1/4 tsp almond extract
For the berries and cream:
- 2 1/2 Cups fresh berries (blackberries, strawberries, raspberries, blueberries, etc)
- 2 Tbsp water
- 2 Tbsp honey
- 1 Tbsp jam (raspberry or strawberry)
- 2 Cups heavy cream
- 2 Tbsp powdered sugar
- 1/2 tsp vanilla extract
Instructions
- First, make your angel food cake! Preheat the oven to 350° Fahrenheit. Do NOT grease your angel food cake pan! And be sure you do NOT use a non-stick pan – link here for the correct type of angel food cake pan. You actually want your cake to stick to the pan so that you can let it cool/dry upside down once it comes out of the oven. First, pulse the white sugar in a food processor until fine and dusty. Remove one cup of the sugar and set aside, then add the flour, sweet rice flour, and salt to the food processor with the remaining 1/2 cup of sugar, and continue to pulse for 30 seconds.
- Then, separate your egg whites into a large bowl. I recommend separating one egg at a time into a small bowl in case any shell or bits of egg yolk get into the whites (if egg yolk does get into the whites, you have to throw them out – they will not whip correctly). Once all of your egg whites have been separated into a large bowl, let them sit at room temperature for at least 30 minutes (if your eggs are already room temp, skip this step). Once the eggs whites are room temp, use an electric mixer to beat the egg white on medium speed until foamy. Add in the cream of tartar and continue to beat until very soft peaks form. At this point, get the 1 cup of the fine sugar you set aside and start sprinkling it into your egg whites (while still beating with the mixer), 2 Tbsp at a time (do not pour sugar all in at once or it will deflate the eggs). Continue to beat and sprinkle in sugar until all sugar has been combined, and until stiff peaks form (this will take about 10 minutes). Add in the vanilla and almond extracts and beat to combine.
- Once stiff peaks form, slowly fold in the flour+sugar+salt mixture 1/4 cup at a time until all of the mixture is combined into a voluminous cake batter. Do not mix, as this will deflate the eggs. Carefully scoop the angel food cake batter into your un-greased pan and then shimmy the pan on the counter to even out the top of the cake batter. Bake for 35-40 minutes or until a skewer inserted into the center of one side of the cake comes out clean. Remove from oven and immediately turn the cake, in the pan, upside down. Let the cake cool completely upside down for about 2 hours (or longer). This will preserve the height of the cake – if you let it cool sitting right side up, it will settle and not be fluffy.
- For the topping:
- While the cake is cooling, make your berries and cream! First, put all of your berries in a medium bowl. Then, make the glaze for your berries (totally optional). In a small saucepan, combine the water, honey, and jam and heat on medium-low, stirring constantly, until smooth and thicker. Remove from heat and pour the glaze through a sieve. Then, pour the strained glaze over the berries and toss to coat.
- In a separate large bowl, using an electric mixer, beat the cream on medium speed until thicker. Add in the vanilla and powdered sugar and continue to beat until medium peaks form.
- Once the cake is completely cool, turn right side up and run a butterknife around the edges of the pan to loosen the cake. Push the cake out of the pan and plate on a serving dish either right side up or upside down (I like upside down). Either decorate with berries, or slice immediately and serve with berries and cream.
Tag @sisterssansgluten on Instagram if you snap a photo of your cake!
Food photography and styling by Amelia Farber


4 Comments
Pingback:
Pingback:
Pingback:
Pingback: