

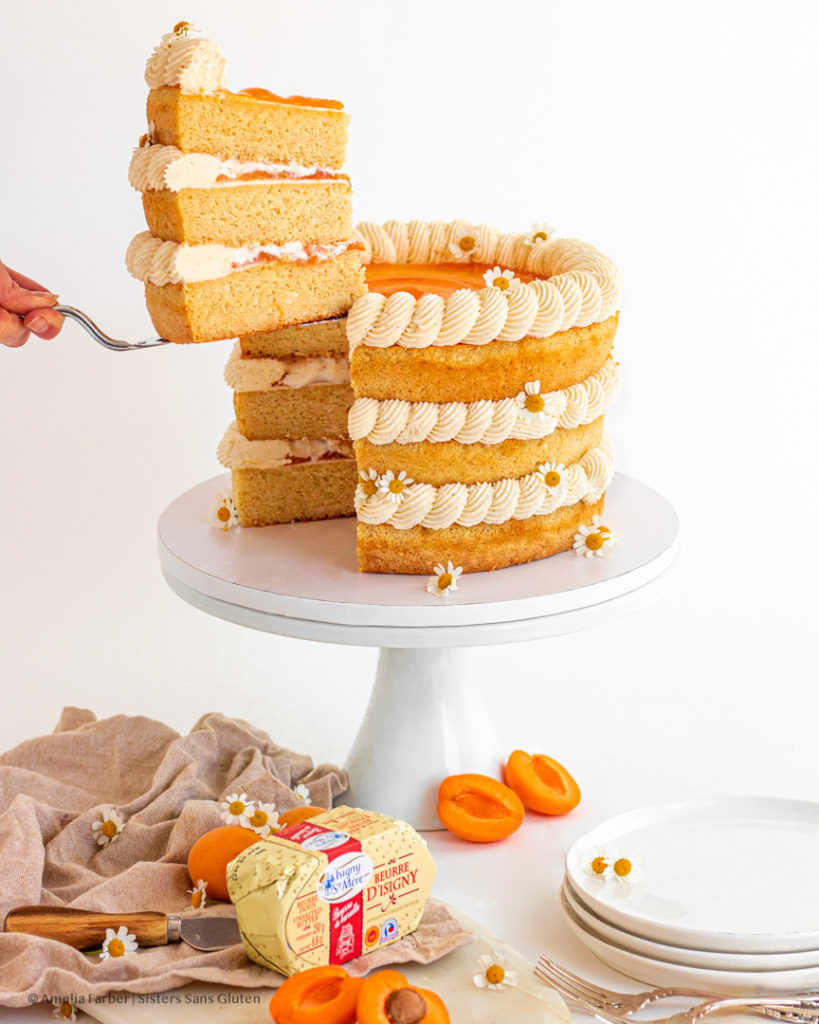
This has probably been one of the most exciting partnerships we’ve done thus far: Isigny Butter! For those of us who’ve been following along with Sisters Sans Gluten for a while, you know that we LOVE butter. We buy it by the pounds for everything from cakes to cookies to brownies to buttercream and everything in between. Our freezers and fridges are constantly stocked with various butters for various projects. So when we pitched a partnership to Isigny Butter and they accepted, it was a DREAM come true. Isigny Sainte Mère is a dairy cooperative in Normandy in northern France where the dairy’s cows roam on gorgeous green pastures along the coastline. Formed in the early 1900s when two dairies joined forces, the cooperative has continued to produce exceptional butter, cream, cheeses, milks, and more for nearly a century. In addition to being a steadfast and world-renowned dairy producer, their products are also PDO – Protected Denomination of Origin, which essentially guarantees that they have been produced using local/regional ingredients, and a traditional production method. This butter is some of the absolute best you can find. Through working with the Isigny America team, I now have their dairy cooperative on my travel bucket list, not only for a chance to taste their cheeses and butters at the source, but also because it’s truly a breathtaking location. Until I can get over there, I’ll have to make do with this INCREDIBLE gluten free browned butter cake with apricot and vanilla bean ermine buttercream (WOW), featuring Isigny butter!
As a small business focused on food blogging, recipe development, food stlying/photography, and product photography, we establish paid partnerships with brands which help us to keep doing what we love – baking incredible gluten free stuff! There is a tremendous amount of time, effort, and money that we put into this blog (and all of our other social channels) including ingredients, bakeware/baking tools, food styling/photography props/backgrounds, photography equipment (cameras, lenses, tripods, camera stands, memory cards), photo editing software, the list goes on, so these partnerships are essential to allowing us to keep this all going. We do, however, only partner with brands whose products are, in our opinions, fantastic. We want to give you honestly-good ingredients to use in our honestly-good recipes, and this partnership with Isigny is certainly that: their butter is incredible. We used their unsalted butter, noted in the recipe, for the gluten free browned butter cake and for the vanilla bean ermine frosting, and it was all-around fantastic.
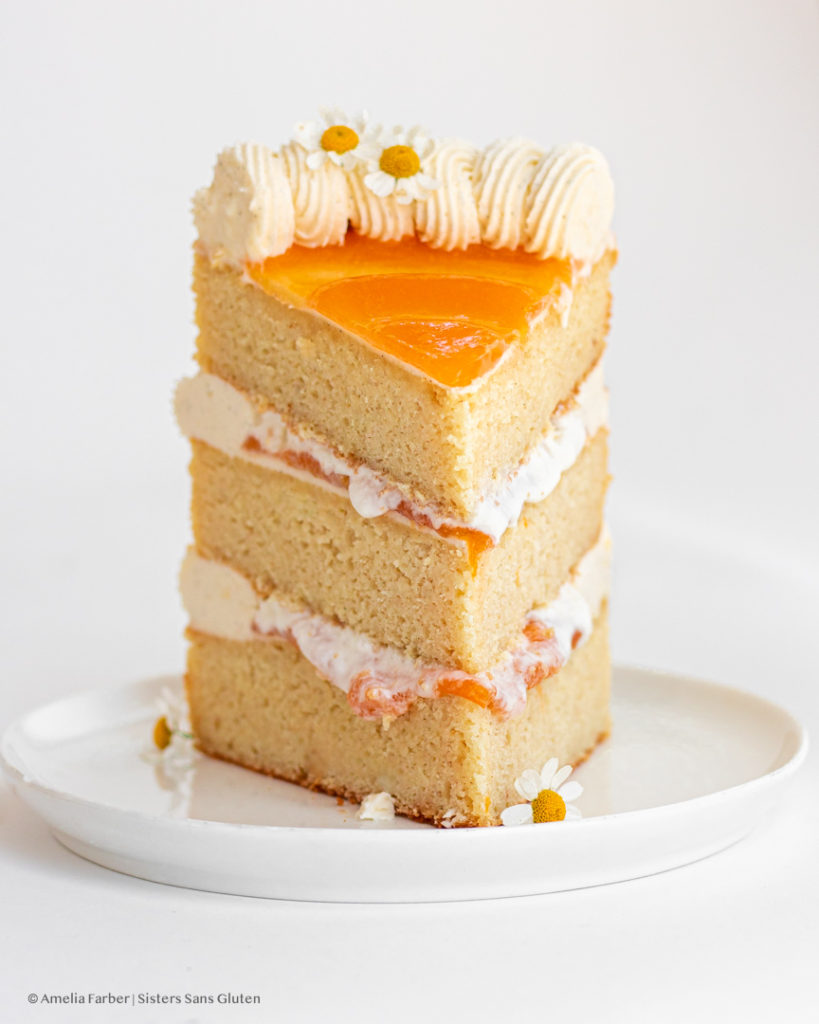
Notes on the Cake Itself
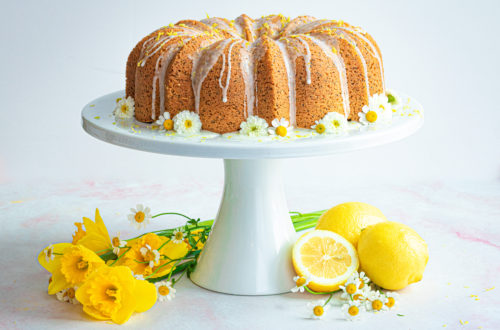
The cake is a rich, delicate browned butter cake – three layers for the perfect size for a small crowd or for leftovers. I used apricot preserves to fill the layers and top the cake and the combination of browned butter, apricot, and vanilla bean is truly a revelation.
The frosting was the part I was most excited for because it was a type of frosting I’d never tried making before but got tons of recommendations to try. Ermine frosting, or boiled milk frosting or flour buttercream or ermine buttercream (it has LOTS of names!), is essentially a frosting of two parts: butter (creamed/beaten as if you’re making American buttercream) and a cooled cooked pudding made of starch/flour and milk. The pudding itself is very simple to make, and it chills fairly fast, especially when spread on a cookie sheet like we recommend. You then cream the butter (for MULTIPLE minutes to get really-white frosting), and then slowly add a heaping tablespoon of cooled pudding at a time, beating to incorporate in between. Why is this frosting so great? It has a gorgeously-velvety texture, for one. And it’s not too sweet! If you’re not a hug fan of American buttercream this is a fantastic frosting for you to try. American buttercream needs tons of powdered sugar for the actual structure of the frosting, since it’s just butter + powdered sugar, but Ermine gets its structure from the combo of the butter + pudding, so the sweetness is much milder. It’s similar to German buttercream, which is essentially pastry cream + butter (I’ll be making a cake with that soon so stay tuned!).
If you liked this…
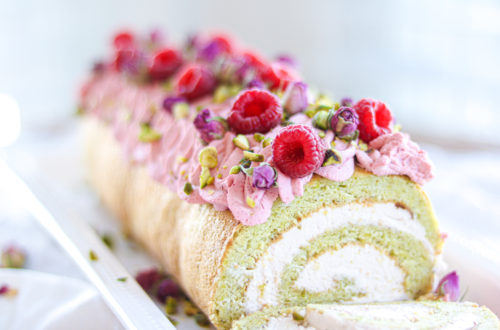
If you love this cake, and are into the unfolding stone-fruit season before us, then you should absolutely make these peaches & cream cupcakes, or this peach + plumb crumble. Or perhaps vanilla bean is your thing, in which case I highly recommend this vanilla raspberry cake with vanilla bean buttercream, or this vanilla bean cheesecake, or this vanilla bean panna cotta, or these French canelés (a baked vanilla bean + rum custard)!
Gluten Free Browned Butter Apricot and Vanilla Bean Cake
Equipment
- Three 9-inch round cake pans
- Three cake pan strips
- Large saucepan
- Cookie sheet
- Parchment paper
- Electric mixer
- Piping bags and tips
Ingredients
For the cake layers:
- 1 ½ Cups browned Isigny unsalted butter start with 1 ⅔ cup unsalted Isigny butter, instructions below
- 1 ½ Cups white sugar
- 9 large egg whites
- 1 Tbsp vanilla extract
- ¾ Cup sour cream
- 1 ¾ + 2 Tbsp whole milk
- 2 ¼ Cups gluten free 1-1 flour mix with xanthan gum added if it doesn’t have xanthan gum, add 1 teaspoon xanthan gum
- ¾ Cup packed blanched almond flour
- ¼ Cup + 2 Tbsp sweet rice flour
- ¼ Cup + 2 Tbsp arrowroot starch
- 3 ¾ tsp baking powder
- 1 ½ tsp baking soda
- 1 ⅛ tsp salt
For the vanilla bean ermine buttercream:
- 1 ¾ Cup white sugar
- ¾ Cup gluten free 1-1 flour mix with xanthan gum added if it doesn’t have xanthan gum, add 1 teaspoon xanthan gum
- ¼ Cup sweet rice flour
- 1 Tbsp cornstarch
- ½ tsp salt
- 2 Cups whole milk
- 2 Cups (454 grams) Isigny unsalted butter
- Seeds of one whole vanilla bean
- ½ tsp vanilla extract
For the filing + topping:
- ¾ Cup good-quality apricot jam or preserves
- ¾ Cup heavy cream
- 1 Tbsp powdered sugar
- ¼ tsp vanilla extract
Instructions
To make the cake layers:
- First, make your browned Isigny butter! In a medium to large saucepan over medium-low heat, melt the 3/4 cup of Isigny unsalted butter and stir constantly until melted and simmering. Continue to simmer, on medium heat, for at least a few minutes, until the popping and hissing sounds have completely subsided (this is the water in the butter burning off – you’ll know once it’s silent). Continue to cook, stirring constantly, until the butter reaches a deep amber color and smells nutty or caramelly. The butter may foam, so keep stirring/lifting up spoonfuls of the butter to see the color. The browned milk solids will foam up in the center of the pan – once it does that- immediately take off the burner and let sit for a few minutes, then pour (scrape ALL of the brown bits – that’s the flavor!) into a heat-proof small bowl and let it cool to room temp (it should be solid) – you can speed up the cooling process by popping the butter into the fridge fr 15 minutes but don’t leave it there or it will be too hard for the cake layers.
- Once the browned butter is room temp + solid, make your cake layers. Preheat the oven to 350 degrees Fahrenheit, and grease three 9-inch round cake pans with cooking spray or butter. Separately, start soaking your three cake pan strips in a bowl of water (using cake pan strips is optional but will give you moister, level cakes).
- In a large mixing bowl, using an electric mixer, cream the 1 ½ cups of browned Isigny butter with the 1 ½ Cups of white sugar until lighter and fluffy – about 2-3 minutes. While still beating, add the egg whites one at a time, beating to incorporate in between each addition. Once all 9 egg whites have been added, add the vanilla, sour cream, and milk, and beat to combine. Finally, using a whisk or silicone spatula, stir in the gluten free 1-1 flour, almond flour, sweet rice flour, arrowroot starch, baking soda, baking powder, and salt until fully combined.
- If using cake pan strips, remove from the water bowl now and fasten each one to your cake pans. Then scoop the cake batter evenly into each pan – you can use a measuring cup to ensure each pan receives the same amount of batter for even layers. Bake for 30-35 minutes or until a skewer inserted into the center of a cake comes out clean. Remove cakes from the oven and let cool completely before turning out. Once the cakes are cool, I recommend turning them out, wrapping them in two layers of plastic wrap, returning them to the pans, and freezing all three cakes for at least two hours (this will make constructing the cake much easier).
To make the ermine buttercream:
- Once your cakes are in the freezer, make your ermine buttercream. First, line a rimmed baking sheet (I use a cookie sheet) with parchment paper and set aside. Then, in a large saucepan, whisk together your 1 ¾ Cups white sugar, ¾ Cups of gluten free 1-1 flour, ¼ Cup of sweet rice flour, 1 Tbsp of cornstarch, and ½ tsp salt until combined, then turn on heat to medium and whisk constantly for 3-4 minutes as the flour toasts (it will start to smell a bit nutty). Then, still whisking constantly, add in your whole milk and continue to whisk for 3-5 minutes as the mixture slowly thickens. Near the end, it will thicken very quickly into a pudding-like texture, so keep whisking! Once it’s the consistency of a thick/set pudding or pastry cream, remove from the heat and pour all of the mixture into the prepared baking sheet, using a spatula to spread evenly across the pan. Freeze this for 15 minutes or until the mixture is room temp/cool to the touch but not frozen.
- Once the pudding mixture is cool, you can make the buttercream! In a large mixing bowl, using an electric mixer, beat the 2 cups of Isigny unsalted butter until lighter and fluffy (4-5 minutes to get very-white butter). Then, still beating, add 1 Tbsp of the cooled pudding mixture at a time, beating to incorporate in between each addition (it will look like it isn’t mixing in well, just keep beating it!). Once ALL of the pudding mixture has been added (this is a fairly long process), stop beating and use a sharp knife to slice open your vanilla bean lengthwise. Scrape all of the tiny vanilla seeds out and add them to your buttercream. Finally, add the extra vanilla extract and beat the buttercream until smooth. Scoop a couple of cups of the buttercream into a piping bag with your choice of piping tip.
- To make the fillings/topping:
- Before constructing the cake, make whipped cream. In a medium bowl using a whisk or an electric mixer, beat the ¾ Cup of heavy cream until soft peaks form, then add the powdered sugar and vanilla and continue to beat until stiff peaks form.
To construct the cake:
- Unwrap your frozen cake layers and place one on a cake tray/board/or plate. Using a palette knife or butter knife, spread a thin layer of the ermine buttercream on the layer, leaving an inch around the edge of the cake empty. Then spread ¼ cup of apricot jam on top of the buttercream layer. Then pipe a ring of ermine around the empty edge of the cake to form the structure for the filling layer. Fill the remaining space inside the ring with some of the whipped cream, then place the second cake layer on top of the completed filling layer. Repeat until you have placed the third and final cake on top. Decorate the top of the cake however you like – I recommend frosting with a thin layer of ermine, topping that with strained apricot jam, and more piped ermine buttercream around the edge. Then slice and serve!
- To slice the cake easily, use a heated knife – either dip a long sharp knife in hot water (and wipe it dry), or heat it briefly over an open flame (lighter or a stovetop).
- Keep the cake refrigerated until an hour before serving.
Tag @sisterssansgluten on Instagram if you snap a photo of your cake!
Food photography and styling by Amelia Farber


2 Comments
Pingback:
Tristan
Such an incredible cake – not too sweet at all, felt like a spring/summer cake. The frosting was amazing – smooth, velvety, new favorite especially with the apricot jam.