
Gluten free pie crust has been my nemesis for 16 long years. Either it’s a soggy bottom, or too tough, or too mealy and damp, never flaky, never buttery, I mean come on, it turned into a half-ass attempt to carry the actually-good part of any pie: the filling! I would reluctantly pull out my food processor and do what I’d always done and come out with the same dry, crumbly crust that I would (if we’re being honest) throw away after scooping off spoonfuls of custard or pecan or karo. Crisps were a much better match: tons of fruit, tons of spiced, nutty, crumbly (because it was supposed to be) topping, and way less work!
And then came fall 2020 – as if this year hasn’t presented enough challenges, we decided to go for another. And lo and behold it has been WONDERFUL. Backing up, we’re doing a Gluten Free Thanksgiving collab with one of the best gluten free bloggers out there, Emily from Glutenless Apron, who can turn just about anything into a gluten free marvel – from waffles to mac and cheese to cinnamon rolls and donuts. We’ve been meaning to team up with Emily for a while, and whipping up gluten free recipes for some of our favorite Thanksgiving dishes seemed the perfect start. After polling the interwebs for what desserts and dishes we should make gluten free, we came up with two: Emily made gluten free stuffing (a classic) and I took on the dreaded gluten free pie crust!
A week or so later, and I’m happy to report that I have a winner!! HUGE thanks to the pie queen herself, Erin McDowell, who has foolproof “piedance” (pie guidance) for getting the flakiest, most perfect crusts, even if they’re gluten free!! What I’ve learned is that cold is the way to go (cold flour, cold butter, super cold water, cold hands, you get the picture), not to overwork the dough, keep big-ish pieces of butter throughout (because when that cold butter hits a 425 degree oven, steam happens and flakiness is born, and stay calm. I’ve now watched DAYS worth of Erin’s pie videos, and I highly recommend you do too before jumping into the Thanksgiving dessert arena in a week or two. Here are a few to get you started: How to Make Pie Dough and Crust (long but WORTH IT), How to Make the Best Pie Crust, or How to Master Fruit Pies. And for the next level, check out How to Make a Custard Pie! And while you’re at it, go check out her newest book – The Book on Pie – which has a stunning array of the pies of your dreams.
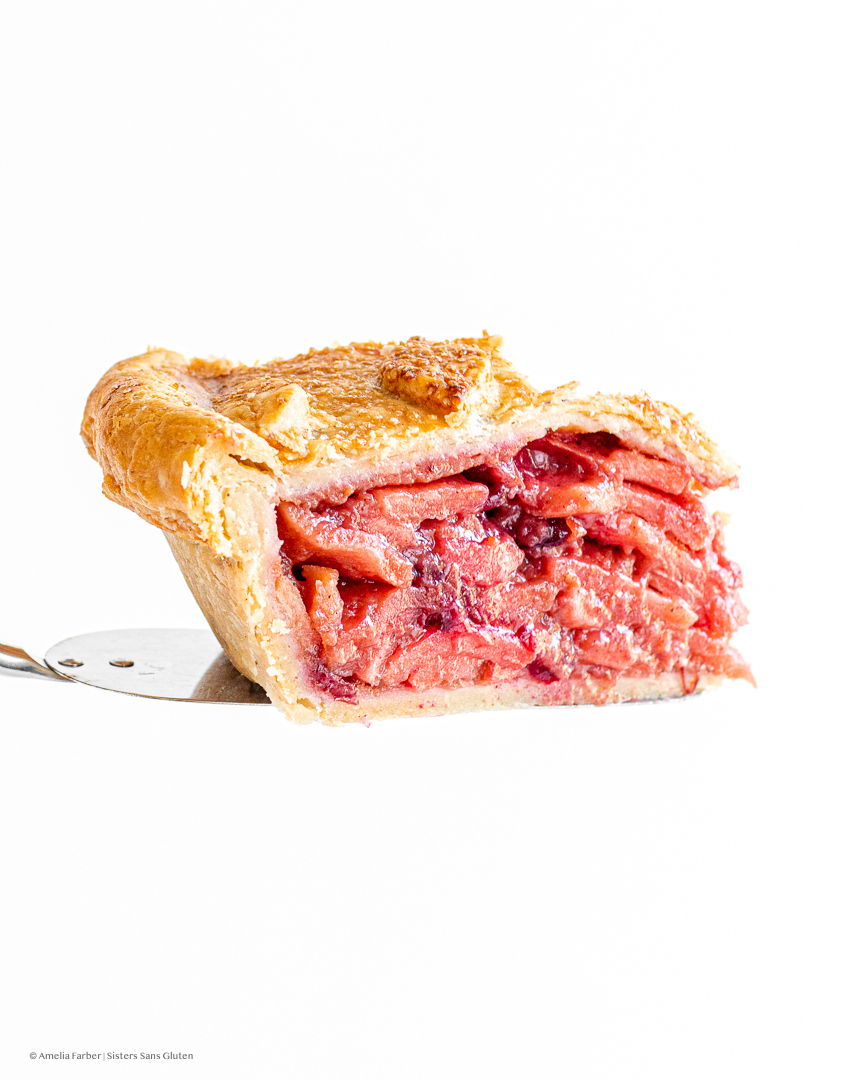
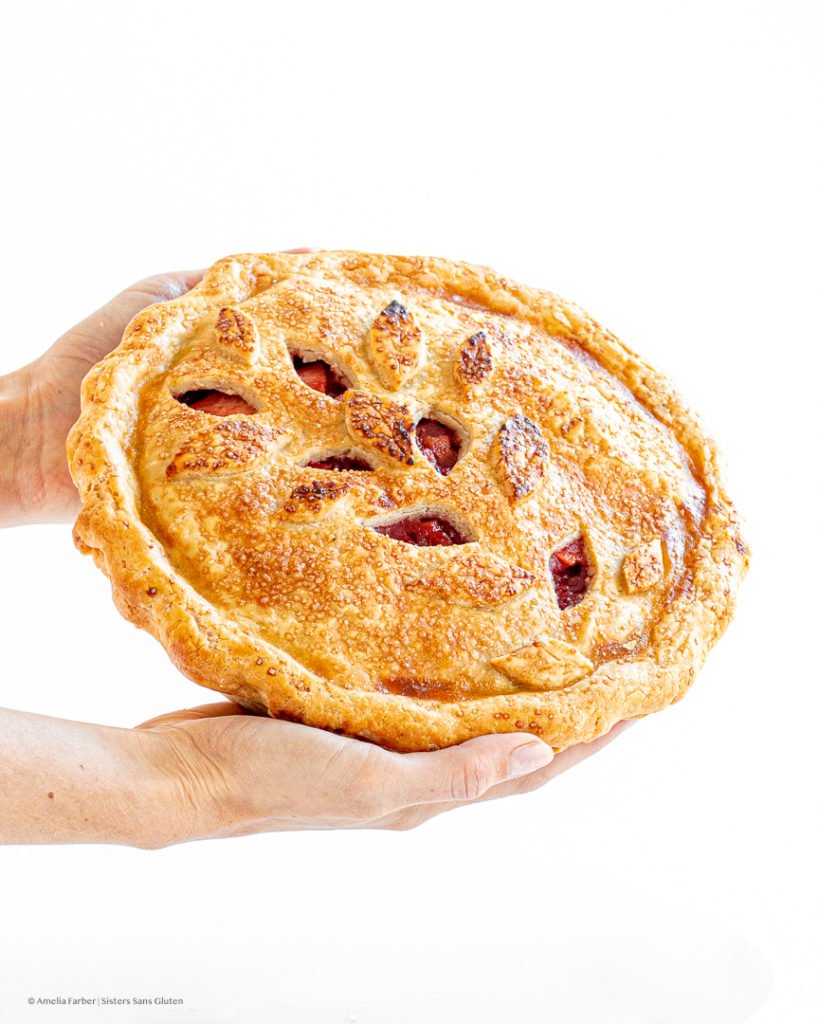
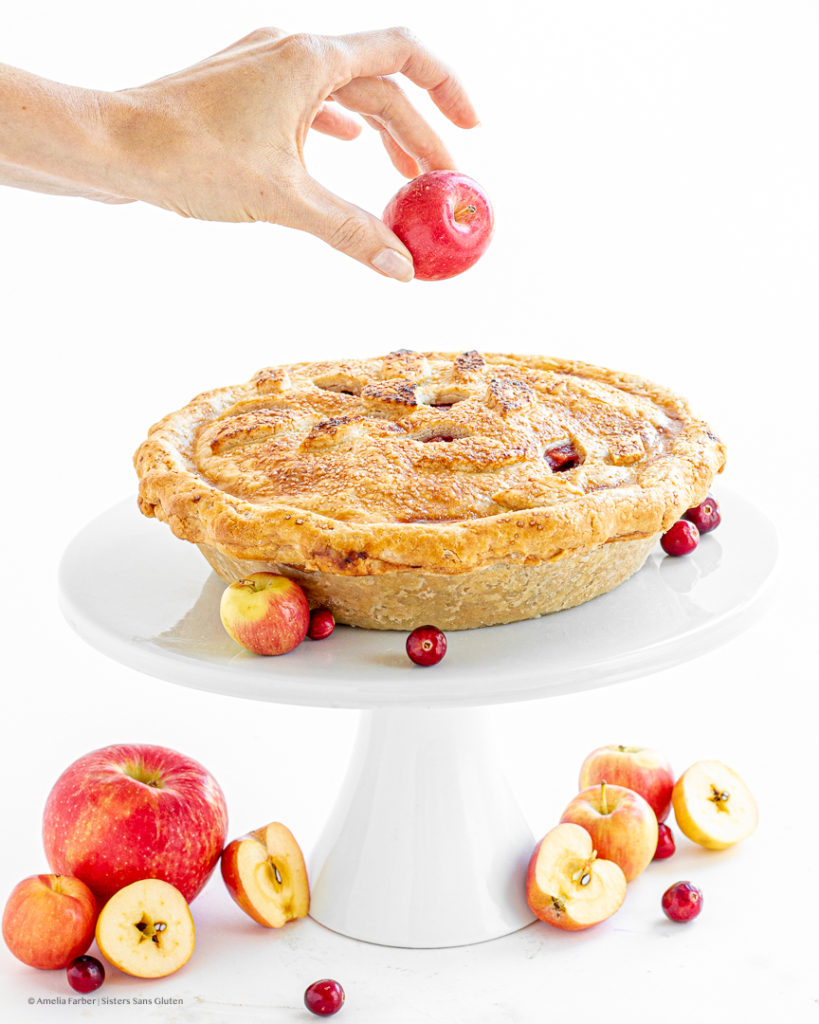
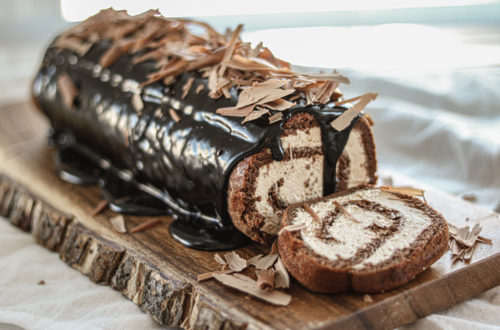
So, for a first stab at this collab, here is my cranberry apple pie, complete with not one but TWO flaky gluten free crusts – and an easy cooked filling! It’ll take some time (what with all the chilling) but don’t rush the crust! If you’re looking for other pies to set your dessert table with, check out our pumpkin pie (though I recommend subbing in this new pie crust recipe, par-baking it like we do here, and then filling and baking your pumpkin pie! And if you just need other Thanksgiving desserts, check out our caramel apple brandy bundt (SO good), or this pumpkin Swiss roll, or these glazed pumpkin Madeleines!
Gluten Free Cranberry Apple Pie
Equipment
- 9-inch pie tin
- Large cooking pot
- Parchment paper
- Pie weights or 4 cups white sugar
- Rolling Pin
- Waxed paper
- Plastic wrap
Ingredients
For the pie crusts:
- 2 3/4 Cups gluten free 1-1 flour mix with xanthan gum included (if the mix doesn't have xanthan gum, add 1 tsp of xanthann gum)
- 1/4 Cup sweet rice flour
- 1/2 tsp additional xanthan gum
- 1/2 tsp salt
- 2 Tbsp sugar
- 1 Cup cold butter
- 1 Cup ice water
For the pie filling:
- 7-8 large apples (mix of various varieties – Granny Smith, Honey Crisp, etc) cored, peeled, and sliced
- 1 1/2 Cup fresh cranberries
- 2 tsp apple brandy
- 1/2 Cup packed brown sugar
- 1/2 Cup white sugar
- 2 tsp lemon juice
- 1/2 tsp lemon zest
- 1/2 tsp vanilla extract
- 1 1/2 tsp cinnamon
- 1/2 tsp ground ginger
- 1/4 tsp ground nutmeg
- pinch salt
- 1/2 Cup melted salted butter
- 1/4 Cup corn starch
For the construction:
- 1 large egg
- 1 tsp water
- 1/4 Cup turbinado sugar
Instructions
To make the pie filling:
- This is a pre-cooked filling, so must be made ahead and cooled. Combine all of the filling ingredients into a large pot and heat over medium, stirring frequently, until bubbling and the apples have softened and the liquid has thickened. Spread the filling on a parchment-lined baking tray to help cool it, and let sit while you make the crusts.
To make the pie crust:
- First, whisk the flours, salt, sugar, and xanthan gum together in a large metal bowl, then chill the flour in the fridge for 15 minutes. Then remove the bowl, take the butter out of the fridge (it should be very cold, but not frozen) and slice into 1/2 inch cubes. toss the butter cubes in the flour to coat. Carefully press each chunk so that it separates into two flatter pieces, and toss everything again to coat. Slowly pour in 1/2 cup of ice-cold water (I put a handful of ice cubes into a large glass of chilled water) and, using your hands, toss everything together again to combine. This is hydrating your dough! Continue to add about a tablespoon of ice water at a time, tossing everything and carefully pressing it together to feel if the dough is hydrated. The dough should be able to be pressed together without crumbling apart, but should NOT be wet or sticky. Do not add too much water, and do not mix the butter completely into the flour (the large bits of butter will make a flakier dough).
- Press the dough together, then slice into two equal halves. Lightly flour a surface and carefully roll out each half and fold the rolled out dough twice, then press together again into a round disk (this will ensure that each chunk of butter is fully coated in flour – if it isn't, the butter will melt out of the crust). Wrap each disk in plastic wrap and refrigerate for 30 minutes.
- Now, parbake the bottom crust! Preheat the oven to 425° then remove one of the crusts from the fridge. Lightly flour a waxed-paper lined surface, and place the unwrapped crusts on the surface. Lightly flour the top of the crust, and the rolling pin, and then roll out the crust to 1/4 inch thickness, at least 10 inches in diameter. Lift crust into the pan (or put the 9-inch pie tin upside down on the crust and lift and turn it over). Carefully press the crust into the pan, and use scissors to trim the extra crust around the edge so that an inch beyond the edge of the pan remains. Then tuck the edge of the crust underneath itself so that it forms a thick edge, then crimp the edge how you want to! Then, refrigerate the prepared crust, covered in plastic, for 30 minutes before baking (the butter+crust must be cold before putting it into the oven).
- Once the prepared crust is chilled, remove from fridge, and use a fork to dock the crust (poke holes in it) all across the bottom and along the sides. Then place a large piece of parchment paper in the crust, and fill with pie weights (or if you don't have any, scoop a few cups of dry uncooked beans or white sugar into the parchment paper to weight it down), this will keep your crust from puffing up/drooping. Bake for 15 minutes at 425 to par-bake the crust. While it's baking, whisk together the one egge and teaspoon of water to create an egg wash. When done, remove the pie weights and immediately brush the entire inside of the crust with some of the egg wash. Let the crust cool completely before filling.
To construct/finish the pie:
- Scoop the cooled filled into the cooled, par-baked crust, and smooth to even the top. Then, take the second, chilled pie crust dough out of the fridge and roll out the crust exactly like the first one. Loosely roll the crust onto the rolling pin and lay it over the filled pie. Lightly press the crust over the filling and into the edges, then use scissors to trim the edges until it's even with the edge of the bottom crust. Then brush egg wash onto the entire crimped edge of the bottom crust, and press the edge of the top crust onto the bottom, forming it to match the bottom crust crimp.
- You can use the extra, cut-of pie crust to cut decorative pieces like leaves. Then cut out your choice of shapes from the top crust – ie leaves, then brush the remaining egg wash over the top crust, and use egg wash to "glue" the decorative pieces to the top crust, brushing egg wash over the pieces. Finally, sprinkle turbinado sugar over the entire top crust and refrigerate the entire pie for 25 minutes to chill the top crust before baking.
- Once the pie is chilled, bake at 425 for 30-40 minutes or until the top crust is deep golden but not brown/burnt. Remove and let cool completely before serving!
Tag @sisterssansgluten on Instagram if you snap a photo of your pie!
Food photography and styling by Amelia Farber


One Comment
Pingback: