

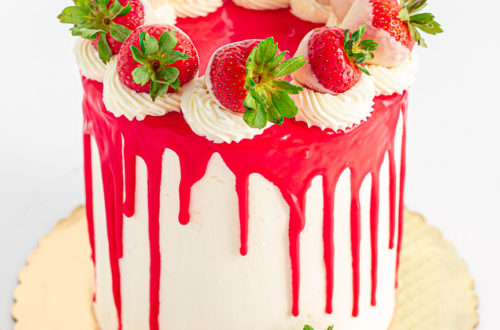
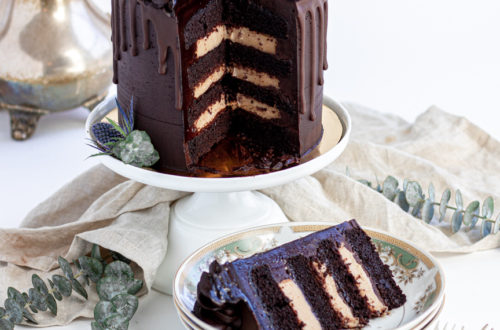
Chocolate + peanut butter, the love of a lifetime. This is, perhaps, my oldest and fondest flavor favorites. There’s something about the cozy, ultra-indulgent pairing of salty, crunchy (or creamy), nutty peanut butter with the richness of chocolate. So this gluten free chocolate peanut butter cake has been a dream for a looooong time. I’d had plans to make some extravagant layer cake celebrating my forever favorite, and just never got around to doing it. So, when a friend requested two small anniversary cakes, one for her (pineapple coconut) and one for her husband (chocolate peanut butter), I ran with it, made extra cake batter, and ended up finally making myself this perfect little 6-inch layer cake number. If you’re like I was just over a year ago, any cake beyond one or maybe two layers, fully frosted, with decoration and a ganache drip sounds utterly terrifying and there’s no way you could possibly make it, hear me out. I was exactly where you are last summer and, after a very stressful Facetime with Kendra, who had already jumped into the layer cake game, I managed to frost and decorate my first EVER layer cake (our strawberry lemonade cake here!). It was four layers of anxiety but after that, I realized I could totally do them and it just took practice. So, to help you get to the below image of your dream chocolate peanut butter cake, here are a few layer cake tips:
Tips for a Fabulous (low stress) Layer Cake:
- Give yourself plenty of time – especially if this is your first layer cake, it’ll take longer than you expect, so make this a weekend baking project so that you’re not pressed for time and rushing through it. There are multiple points where patience is key – you’ll need to freeze or chill your cake layers and then constructed cake and skimping on time may result in disaster (read: cake falling nightmare). Chilling a layer cake during construction is actually necessary, so pay attention to the directions and don’t cut corners.
- Make sure you have plenty of room in your fridge or freezer! This one is key as well because, per the above, you’ll be chilling the entire cake multiple times to set different layers of frosting and ganache, so make sure you have a cake-sized space ready in the fridge or freezer. My freezer can only fit an 10-inch cake board, so if I’m making a cake on a 12 inch board, I have to make sure the fridge has space instead, but otherwise, I prefer freezing my cakes during construction.
- Use a cake scraper – this is essentially a large flat piece of something, usually acrylic or metal, that you use to smooth frosting around and on top of the cake to get that smooth, even look. This is my favorite one here, but there are tons of other options.
- Use piping bags to fill the layers and to decorate the top. There are certainly hacks to create your own piping bags (you can use strong zip top baggies and just cut a corner off, etc), but I really recommend getting a few piping bags and piping tips so that you start to get comfortable using them (if you want to get good at cake decorating).
- Freeze your cake layers BEFORE you start constructing the cake. This is, perhaps, the BIGGEST HACK for layer cakes that I’ve found. What you want to do is fully cool your cake layers, then turn them out of the pans they’re in, wrap them in plastic wrap, then wash the pans, dry them, and place the wrapped cakes back into the pans to hold them steady, then freeze the cake layers (wrapped, in the pans) for at least two hours – over night if you’re planning ahead – and then take them out RIGHT before you start constructing. Why? Layer cakes are structurally unsound creations until they’re fully set, right? I’ve had plenty of close-calls in which a multi-layer cake starts sliding and it’s a terrifying game of the leaning tower of pastry and it might just end up on the floor. To avoid that completely, freezing your cake layers means that when you start constructing, the super-cold cake layers are 1) harder which means less chance of them crumbling when you frost them too aggressively/crumbs getting in the frosting and 2) the cold cakes will automatically harden your buttercream in place!! WHAT. YES. It’s pretty spectacular and will save you from so much heartache and stress.
That’s it folks! There are probably a million more tips that I’ll think of later, but start with these and see how it goes. If you’re looking for something that takes a bit less time, make these glorious chocolate peanut butter mud cookies (always a hit), or this chocolate peanut butter tart, or these chocolate peanut butter cupcakes!
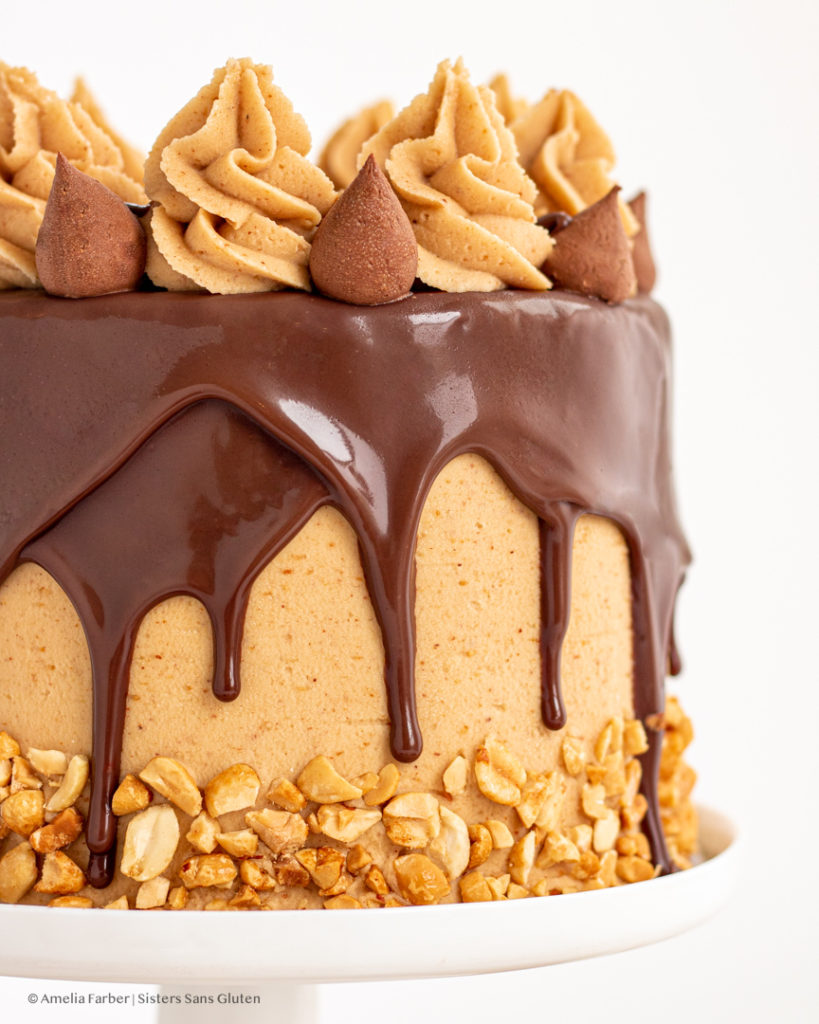
Gluten Free Chocolate Peanut Butter Cake
Equipment
- Two 6-inch round cake pans
- Electric mixer
- Piping bags and tips
- Cake scraper
- Palette knife for frosting
- Cake pan strips (optional)
Ingredients
For the cake layers:
- 1 large egg
- 1/2 Cup sour cream
- 1/4 Cup plus 2 Tbsp vegetable oil
- 1 tsp vanilla extract
- 3/4 Cup plus 2 Tbsp white sugar
- 3/4 Cup gluten free 1-1 flour mix with xanthan gum in it (link below to the one we use)
- 1/4 Cup sweet rice flour
- 1/4 Cup plus 2 Tbsp unsweetened cocoa powder
- 1/2 tsp baking soda
- 3/4 tsp baking powder
- 1/3 tsp salt
- 1/2 Cup hot weak coffee
For the chocolate buttercream:
- 1 1/2 Cups salted butter room temperature
- 2/3 Cup unsweetened cocoa powder
- 2 Cups sifted powdered sugar
- 1 tsp vanilla extract
- 1/8-1/4 tsp salt
- 1-2 Tbsp heavy cream optional
For the peanut butter buttercream:
- 2 Cups salted butter room temperature
- 2 Cups smooth peanut butter
- 4-5 Cups sifted powdered sugar
- 1/8 tsp salt
- 2 tsp vanilla extract
- 1-2 Tbsp heavy cream optional
For the assembly:
- 2.5 oz semisweet chocolate chips
- 1/4 Cup smooth peanut butter
- 1/2 Cup heavy cream
- 1 Cup salted roasted peanuts roughly chopped
Instructions
To make the cake layers:
- Preheat the oven to 300° Fahrenheit and start soaking you two cake pan strips in a large bowl of cool water. While the strips are soaking, mix up the cake batter. In a medium bowl, whisk together all of the dry cake ingredients (gluten free 1-1 flour mix, sweet rice flour, unsweetened cocoa powder, baking soda, baking powder, salt). In a large bowl, whisk together the the egg, sugar, sour cream, vegetable oil, and vanilla extract until fully blended and creamy. Once combined, add in the dry ingredients and use a spatula or wooden spoon to mix. Fun step! Poor in the piping hot weak coffee and stir until fully combined (it’ll take some working).
- Then slightly squeeze out excess water from your cake pan strips and affix them around the two pans. Then grease the two 6-inch round cake pans with either butter or cooking spray. Pour cake batter evenly into the two greased cake pans and bake for 30-40 minutes or until a knife inserted into the middle of the cake comes out clean. Let cakes cool completely before constructing. Once the cakes are cool, carefully turn them out and wrap them in two overlapping pieces of plastic wrap. I recommend washing and drying the cake pans, then returning the wrapped cake layers to their pans and freezing the wrapped cakes in the pans for 2 hours to make construction easier.
To make the buttercreams:
- While the cake layers are freezing, make the chocolate and peanut butter buttercream. Chocolate buttercream: in a large bowl, using an electric mixer, beat the room temp salted butter until smooth, then add one cup of the sifted powdered sugar and beat to combine. Continue adding the ingredients (vanilla, salt, cocoa powder) and beat between each addition. Finally, add the remaining sifted powdered sugar, beating to combine. Taste your buttercream and determine if you want more cocoa powder, more powdered sugar (if the buttercream is too bitter or too loose), or if the buttercream is too stiff to pipe, add a tablespoon or two of heavy cream and beat to combine.
- Then make the peanut buttercream. In a large bowl, using an electric mixer, beat the room temp salted butter until smooth, then add one cup of the sifted powdered sugar and beat to combine. Add the peanut butter and beat for 30 seconds until thicker and creamy. Continue adding the ingredients (vanilla, salt, sifted powdered sugar) and beat between each addition. Add more powdered sugar if the buttercream is too loose, or a tablespoon of cream if it's too stiff to pipe.
To construct:
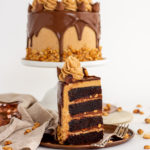
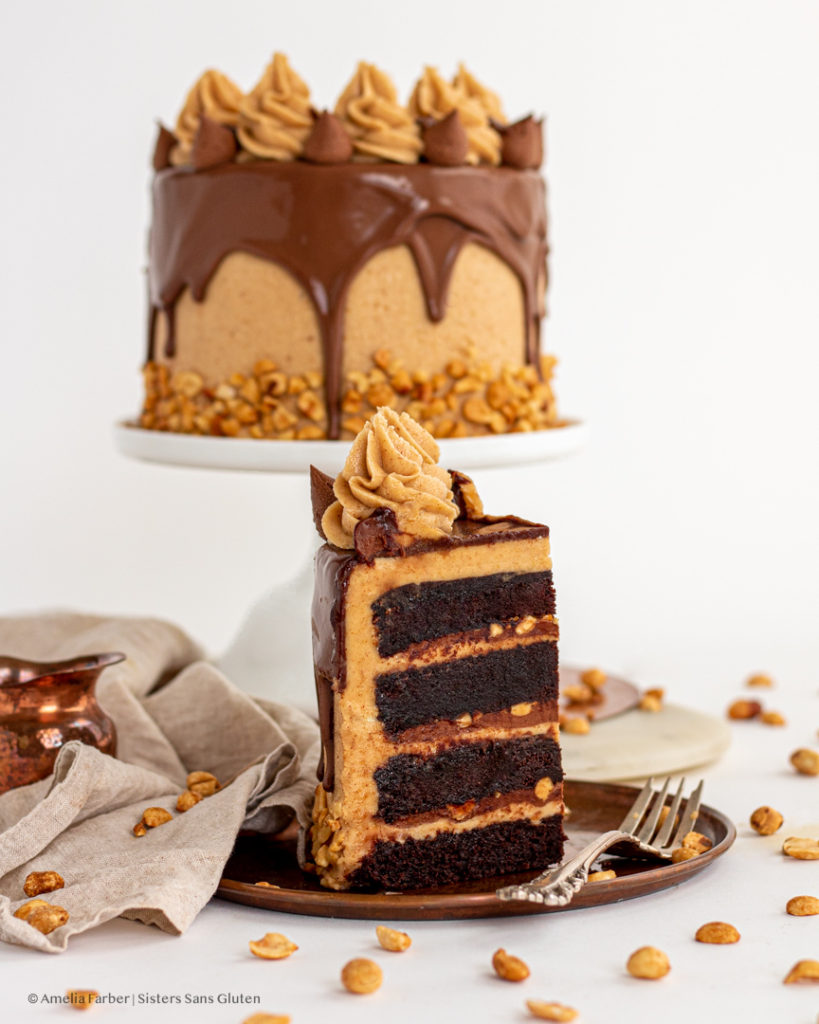
- Once the cake layers are frozen, carefully unwrap the plastic wrap, and prepare a cake decorating stand. Use a long, sharp knife to carefully slice your two cake layers in half so that you have four thinner cake layers. Place one of the cake layers on a cake board on the cake decorating stand. Then frost the layer with a thin layer of the peanut butter buttercream, using a palette knife to smooth the frosting. On top of that, frost with a generous layer of the chocolate buttercream, smoothing again, then add a sprinkling of chopped roasted salted peanuts. Place a second cake layer on top of this and repeat the two buttercreams and peanuts on each layer until the fourth cake layer is placed on top.
- Crumb coat the entire cake with the peanut butter buttercream, then freeze the entire cake for 15-20 minutes to set the cake and the frosting.
- While the cake is freezing, make your ganache. Microwave the cream in a 2-cup glass measuring cup or heat proof bowl for one minute or until just bubbling. Remove from microwave and add in the chocolate chips and smooth peanut butter and let sit for 30 seconds before stirring slowly with a small spoon until fully combined and silky smooth (it will take a while for the ganache to fully combine). Let the smooth ganache sit until it has cooled.
- While the ganache is cooling, remove the cake from the freezer and add a final layer of the peanut butter buttercrearm and freeze for 10 minutes. Then remove and place back on the cake decorating stand. Pour your cooled (but not cold) ganache (Ensure the ganache is still liquid and can drip down the cake ie, it hasn't cooled too much. If it has, put back in the microwave for 10 seconds) onto the top of the cake and use a palette knife to carefully push the ganache to the edge of the cake and let it naturally drip down the sides (or apply a drip with a piping bag for a more uniform look). Once the drip is done, freeze the entire cake again fro 10 minutes.
- Finally, remove the cake from the freezer, and scoop the excess peanut butter buttercream and chocolate buttercream into two piping bags with tips of your choice. Pipe buttrcream around the top edge of the cake, and add the remaining chopped peanuts to the bottom or top of the cake.
- I recommend Keeping the cake in the fridge until an hour before serving. It is easiest to slice the cake while it is still chilled (just out of the fridge), and use a long sharp knife that you either hold over an open flame or dip in a pitcher of hot water to get clean slices in the cake.
Tag @sisterssansgluten on Instagram if you snap a photo of your cake!
Food photography and styling by Amelia Farber


2 Comments
Keith
This is one of my favorites! I eat too much of it at once, it’s so fabulous!
Alene
I’m going to try out my own blend because of the rice thing. But should I just skip the sweet rice since my blend will have something to hold it together, I think. It’s all a magical mystery tour for me. Thanks!