
If you also have childhood memories of summer camping trips complete with seemingly endless (one hour) drives into the mountains, squished into the backseat with your sibling(s) and one of the handful of dry goods boxes or coolers meant to sustain you and your family for a weekend inn the woods, then this post is for you. S’mores were a particular favorite for us and our many cousins on family reunion campouts where we all hovered around ember-stage fire pits with roasting sticks in hopes of getting just the right golden tinge around our fluffy white glob of sugar. There were those, of course, who insisted that they loved their marshmallows toasted to a crisp and that the only proper way to prepare your marshmallow was to engulf it in flames and only put out the mini fireball once all of the powdery outside had been charred black.
S’mores, apparently, were first introduced in the US in the 1920s by the Campfire Marshmallows company, who published the recipe for a “Graham Cracker Sandwich” in a book of marshmallow-laden recipes. Thankfully, popular culture responded with a much cooler name, and the “Some More” was born, which, in turn, morphed into “S’more.” It seems appropriate that the first major groups to latch on to this sticky campfire treat were the Girl Scouts and Boy Scouts in the US. As a proud Girl Scout for over 10 years, I can fully attest to the popularity of s’mores around the giant campfire at Girl Scout camp every summer. It was a tradition to all crowd around the bonfire pit once the fire had died down and use the roasting sticks we had sharpened with our pocket knives earlier in the week. We’d accompany the post-sunset s’mores with skits and songs or just get hyped up on the sugar bombs and then run down to the lake and shout as loud as we could to the rival Boy Scout Camp across the water. In our eyes, we always won the cross-lake yell-off.
While we’re all still (mostly) stuck inside, or at least close to home, here’s my take on an apartment-friendly version of this timeless treat: these gluten free s’mores cupcakes! I’m particularly proud of the homemade marshmallow fluff, which, as it turns out, is remarkably (perhaps dangerously) easy to make! Anyone who had fluffanutter sandwiches in elementary school (or who, like me, always envied their best friend who did have them every day), we, as adults, can once again have that ridiculously unhealthy lunch! Just take two slices of gluten free white bread (toasted, of course, because we all know that gluten free bread lacks a certain everything until it’s been crisped up), slather on some creamy peanut butter and add in a blob of this homemade marshmallow fluff! If you’ve never heard of fluffanutter, do yourself a favor and check it out.
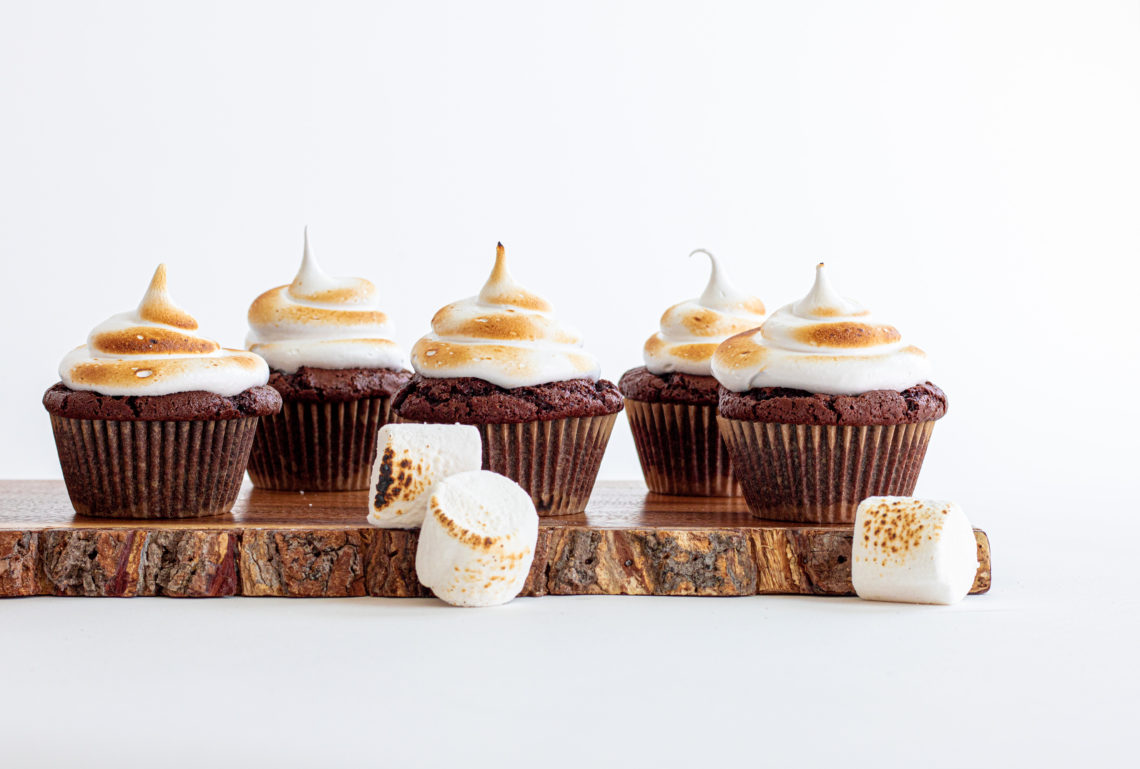
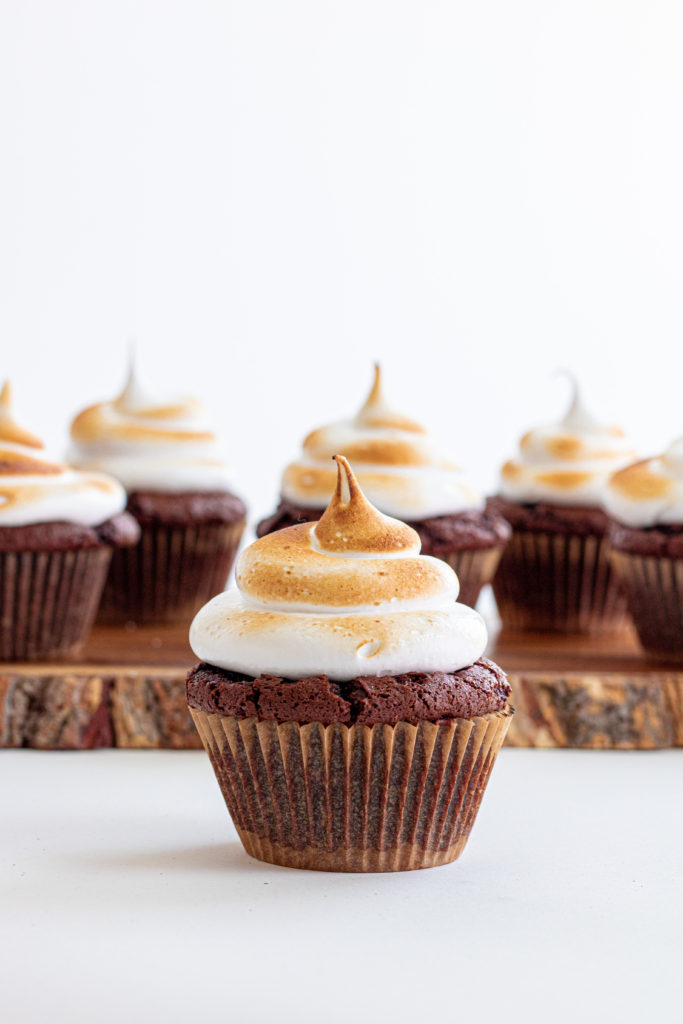
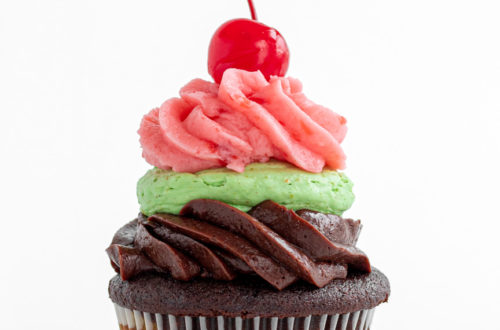
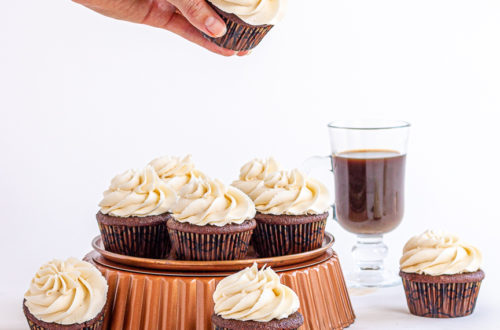
In any case, enjoy these brownie-rich double chocolate cupcakes, nestled over a buttery graham cracker crust, topped with perfectly golden marshmallow fluff. All you need is a recorded crackling fire and something burning on the stove to complete the sensory environment we might all be missing. Here’s to the next time we can go camping and share in the delight of tooth-ache-sweet s’mores around the fire. If you’re looking for other comfort food for the weekend, try our peanut butter and jelly bars, or this downright-delicious banana chocolate chip bread, or even these cinnamon roll cupcakes for a cozy treat.
Gluten Free S’mores Cupcakes
Equipment
- Cupcake pans
- Candy thermometer
- Electric mixer or stand mixer
- Culinary blow torch (optional)
Ingredients
For the graham cracker crust:
- 2 Cups crushed gluten free graham crackers
- 9 Tbsp melted salted butter
- pinch salt
- 3 Tbsp white sugar
For the cupcakes:
- 1 1/2 Cup gluten free 1-1 flour mix with xanthan gum in it (if your mix does not contain xanthan gum, add 1 teaspoon of xanthan gum)
- 1 3/4 Cup white sugar
- 1 1/4 tsp baking soda
- 1/2 tsp baking powder
- 1/2 tsp salt
- 3/4 Cup cocoa powder
- 2 large eggs
- 3/4 Cup sour cream
- 2 tsp vanilla extract
- 1 cup melted chocolate chips or melted semi sweet chocolate bar
- 3/4 Cup canola oil
- 1/2 Cup hot coffee
- 1 Cup chocolate chips or chocolate chunks
For the marshmallow fluff:
- 2/3 Cup water
- 1 1/2 Cup white sugar
- 1 1/2 Cup light corn syrup
- 1 tsp cream of tartar
- 6 large egg whites room temperature
- 1 tsp vanilla extract
Instructions
- First, preheat oven to 350° Fahrenheit. Line two cupcake pans with paper cupcake liners and set aside. In a food processor, or nutribullet, blitz up the gluten free graham crackers to a fine crumb. Dump crumbled crackers into a medium bowl and mix in the melted butter, salt, and sugar until the mixture looks like wet sand. Scoop a near-tablespoon of the mixture into each of the lined cupcake cups and press down with your fingers until a crust is made. Bake for 5-7 minutes and then remove and let cool.
- While the crust is baking, make the cupcakes. In a large bowl, whisk together the flour, sugar, baking soda and powder, salt, and cocoa powder. Then, in another large bowl, whisk together the eggs, sour cream, vanilla, oil, and melted semi-sweet chocolate until smooth. Pour in the whisked dry ingredients and stir entire mixture until combined. Add in the hot coffee and mix. Then stir in the chocolate chips. Spoon out the mixture into the cupcake cups on top of the graham cracker crust – each cup should be 3/4 to nearly full. Bake for 20-26 minutes. Less time will yield fudgier brownie cupcakes, longer will give you cakeier cupcakes (I usually go for fudgier at 20-22 mins). Remove and let cool.
- While the cupcakes are baking, make the marshmallow fluff. In a small saucepan, combine the water, corn syrup and sugar over medium heat. Stir occasionally until all of the sugar dissolves, and then stop stirring immediately and let simmer (turn down to med-low heat). Insert your candy thermometer to check temp – this will take 5-10 minutes. Let the mixture simmer (do NOT stir it) until it reaches 240 degrees Fahrenheit (softball stage). While the mixture is cooking, make the meringue.
- In a large, perfectly clean, dry bowl, begin beating your room temp egg whites with your electric mixer. If there is any oil or crumbs in the bowl, the egg whites will not get stiff, so make sure all implements are clean and dry. Beat egg whites until foamy and then add in the cream of tartar and continue to beat until soft peaks form. Let sit until your sugar mixture has reached softball stage.
- Once the sugar syrup is at 240 degrees, immediately turn off heat, and, using heat pads (or a friend to help!), start beating egg whites again and slowly pour in the hot sugar mixture into the egg whites. Beat constantly until all of the sugar mixture has been added (pour in a slow stream, do not dump it in). Do not stop beating the egg whites! Continue to beat after all the sugar syrup has been added, until the bowl is back to room temperature (it will be very hot after adding the syrup). You can add a bag of frozen peas under the bowl or on the side to help cool the bowl as you beat the mixture. This will take 10 or so minutes, so be patient. As the bowl cools, the mixture will become thicker and stiffer and stickier as the marshmallow forms!
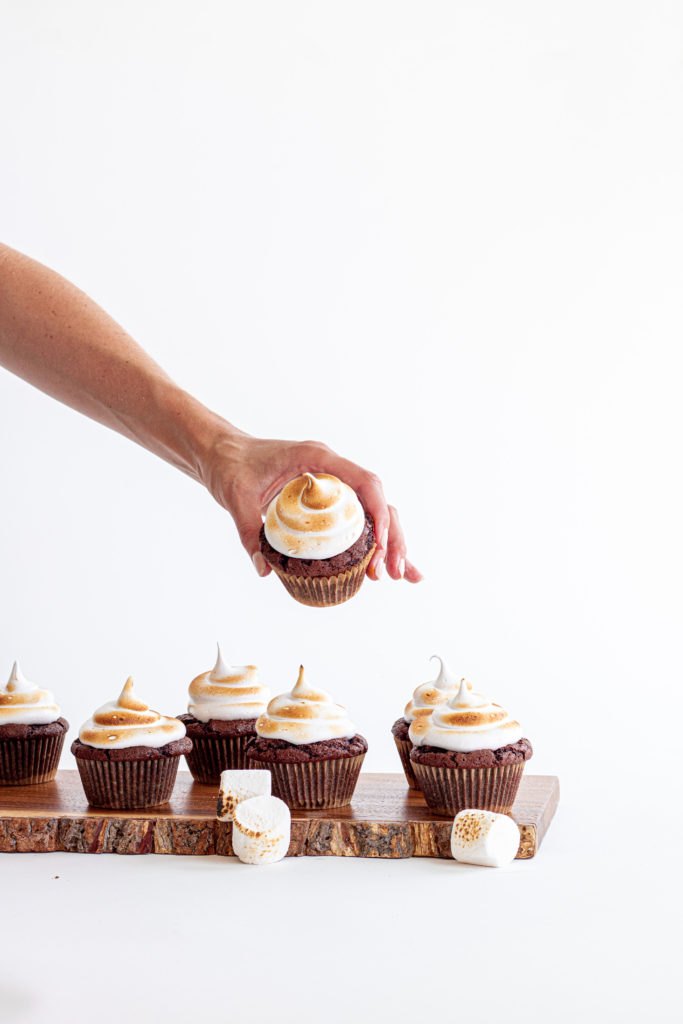
- Once the bowl is room temp, you can stop beating the marshmallow. Scoop it into a piping bag and pipe onto the cooled cupcakes (the fudgier cupcakes will fall in the center which makes a great pocket for more marshmallow fluff!). Optional step: toast the marshmallow topping once piped with a culinary blow torch!
Tag @sisterssansgluten on Instagram if you snap a photo of your cupcakes!
Food photography and styling by Amelia Farber


2 Comments
Pingback:
Pingback: