I have a close relationship with peanut butter. In second and third grade, I packed my own lunch. Both of my parents grew up with the necessity to make most things themselves – their parents were broke students and young parents, trying to make ends meet by donating blood, as my Grandpa John did, and betting the other guys at the Red Cross that he could fill the pouch faster than they could (he won most of the time). When my parents were, as their parents had been, broke, raising two kids and post-dating checks at the grocery store so that they wouldn’t be cashed until after payday, they taught us both, by example and instruction, how to be our own person and make anything we wanted to without buying it. Being self-sufficient is perhaps one of the greatest gifts my parents instilled in us. We don’t have to go through life looking for praise for cooking dinner or changing a lightbulb, we simply do it because we know how to and it’s practical that we do. We know the names of flowers and trees and how to plant a garden and make it grow. We know how to paint our own bedroom and hang pictures on the wall and clean a bathroom and fix a broken dresser drawer and create things because these are things that, when you don’t have extra money to spend, you simply need to know how to do yourself. Plus, then you know it’ll be done right. A lot of you will know this already, but props to those of you who weren’t taught all of this as kids and who are committing to learning how to be self-sufficient now that we’re all stuck at home. But just a thank you to my parents for giving me the gift of knowledge and the confidence to figure out how to do something if it’s new. Heck, that’s been the entire baking journey on this blog – make it yourself and learn as you go.
All that being said, I started packing my own lunch in kindergarten and boy howdy did I stock up on the peanut butter. I’d make two peanut butter and jelly sandwiches every day (this was pre-Celiac diagnosis), and maybe an orange or something. But those peanut butter and jelly sandwiches gave me LIFE in the long haul between noon and 3pm when the second hand of the clock on the classroom wall seemed to swim through molasses. They also provided a sweet, homey respite during days at Lake of the Woods or on hikes up Table Rock because we’d always pack PB&Js for snacks – stuffed into small ziplocks, the jam soaked into the bread so that it became a sort of cake. Peanut butter was again my comfort food after we’d walk home from middle school and have an hour or so to goof off in the backyard before homework, dinner, and parents were home. I would scoop peanut butter into a bowl, top it with semi-sweet chocolate chips, and call it a day (this was post-Celiac diagnosis). And when I eventually learned that Reeses Peanut Butter Cups were, in fact, gluten free, Halloween became a LOT more fun again.
So these gluten free chocolate peanut butter cupcakes are a love letter to peanut butter, and it’s dear friend chocolate. They’re far more decadent than the quick and easy snacks I used to throw together for after-school shenanigans or hikes and they definitely don’t pack as well for either, but they’re pretty darn incredible. I even made a few dozen buckeyes and stuffed one in each of the chocolate cupcakes before topping it off with dual-toned peanut butter and chocolate buttercream. Because go big or go home, especially with peanut butter. If you’re a peanut fan, try out our PB&J bars (super easy and perfect for a lunchbox), or these Do-si-do/Nutter Butter look-alikes.
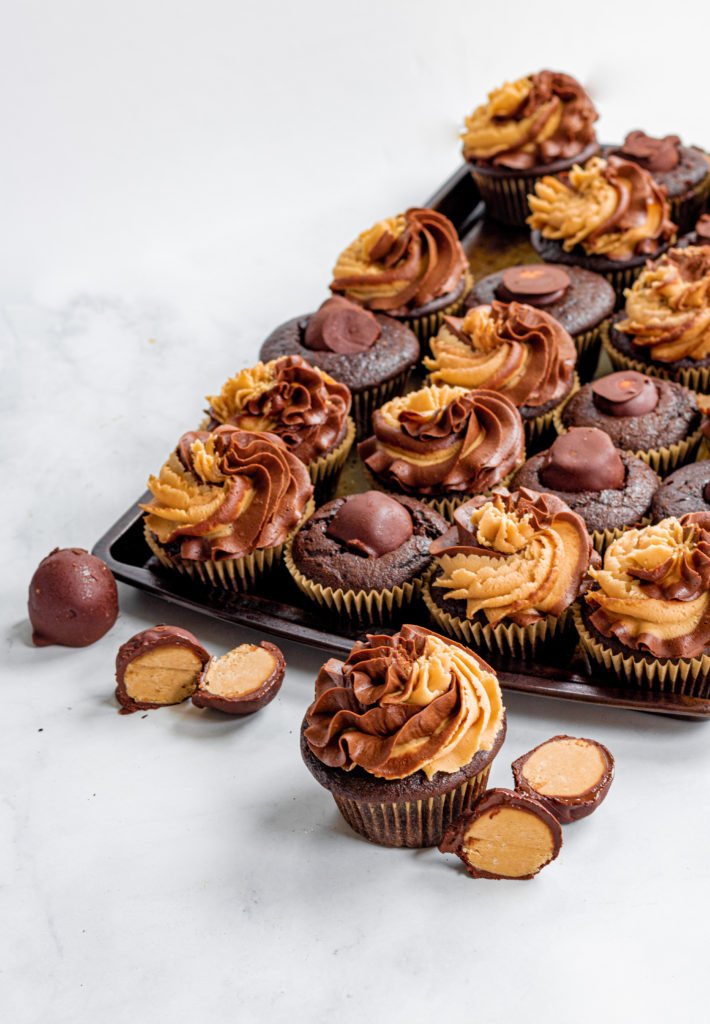
Gluten Free Chocolate Peanut Butter Cupcakes
Equipment
- Cupcake pans
Ingredients
For the buckeyes (these go inside the cupcakes):
- 1 Cup creamy peanut butter
- 1/2 Cup salted butter room temperature
- 1 tsp vanilla extract
- 2-2 1/2 Cups powdered sugar
- 1 1/2 Cups chopped good quality chocolate I use a mix of dark and milk chocolate
For the cupcakes:
- 2 Cups gluten free 1-1 flour mix with xanthan gum included (if the mix doesn't have xanthan gum, add 1 tsp of xanthann gum)
- 3/4 Cup cocoa powder
- 1 3/4 Cup white sugar
- 1/2 tsp salt
- 1 1/4 tsp baking soda
- 1/2 tsp baking powder
- 2 large eggs
- 1 Cup sour cream
- 2 tsp vanilla extract
- 1 Cup hot coffee
- 3/4 Cup canola oil
For the peanut butter buttercream:
- 1 Cup salted butter room temperature
- 1 Cup creamy peanut butter
- 3 1/2 Cups powdered sugar
- 2 tsp vanilla extract
- 2-4 Tbsp milk
For the chocolate buttercream:
- 1 Cup salted butter room temperature
- 1/2 Cup cocoa powder
- 2 tsp vanilla extract
- 2 Cups powdered sugar
- 1/8 tsp salt
- 1-2 Tbsp milk
Instructions
- First, make the buckeyes. In a medium bowl, stir together the peanut butter, vanilla, room temp butter, and powdered sugar (1/2 cup at a time). It will be very stiff once all the powdered sugar is added – keep mixing! The mixture should be stiff enough to roll into balls, but not too dry (it shouldn't crumble – if it does, add a bit more peanut butter or butter). Once mixed, scoop 1 tablespoon at a time and roll into 1-inch balls. Place on a waxed-paper-lined baking sheet or plate and once you've used all of the mixture and rolled it into balls, place them in the freezer to chill for 30 minutes. While balls are chilling, melt the chocolate in the microwave in 45 second intervals (stirring in between). Once balls are chilled, remove from freezer and use a fork to dunk each one into the chocolate mixture so they are completely covered. Let drip/dry back on the waxed paper baking sheet, then set aside while you make the cupcakes (there will be a few extras so you can eat one buckeye now!).
- Next, make the cupcakes. Preheat the oven to 350° F and grease two 12-cupcake pans with either butter or cooking spray, or line with paper cupcake cups. In a medium bowl, sift together all of the dry cupcake ingredients (flour, sugar, cocoa powder, baking soda, baking powder, salt), and whisk to combine.
- In a separate large bowl, whisk together the eggs, sour cream, canola oil, and vanilla extract until fully blended and creamy. Once combined, add in the dry ingredients and use a spatula or wooden spoon to mix. Fun step! Poor in that cup of piping hot coffee and stir until fully combined (it’ll take some working). Pour batter into the cupcake pans (each one should be about 2/3-3/4 full) and bake for 20-22 minutes or until a toothpick inserted into the middle of one of the cupcakes comes out clean. Remove from oven and let cool.
- While the cupcakes are cooling, make the buttercream! First, peanut butter: In a large bowl, using an electric mixer, beat the room temp butter and peanut butter and vanilla until creamy. Add in the powdered sugar 1/2 cup at a time and beat on low until combined. Then add in the milk 1 tablespoon at a time – you want to get a consistency that's firm but not too stiff to pipe, it should be smooth and creamy looking. Spoon 1/2 of the frosting into a thick line onto a sheet of plastic wrap, and wrap it into a log, then set aside.
- Then, the chocolate buttercream: In a medium bowl, using an electric mixer, beat the room temp butter and cocoa powder and vanilla until smooth. Add in the powdered sugar 1/2 cup at a time and beat on low until combined. Then add in the milk 1 tablespoon at a time – you want to get that same consistency that's firm but not too stiff to pipe, it should be smooth and creamy looking. Spoon 1/2 of the frosting into a thick line onto a sheet of plastic wrap, and wrap it into a log, then place both of the logs vertically into a piping bag with a piping tip inside (this will allow you to pipe the two flavors at once onto the cupcakes.
- Before piping the buttercream onto the cupcakes, use a melon baller, paring knife, or large piping tip to cut a hole into the top of each of the cooled cupcakes as in the picture here. Fill each hole with one of the buckeyes.
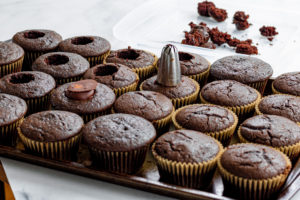
- Then pipe frosting onto the top of the cupcake+buckeye and serve!
Tag @sisterssansgluten on Instagram if you snap a photo of your cupcakes!
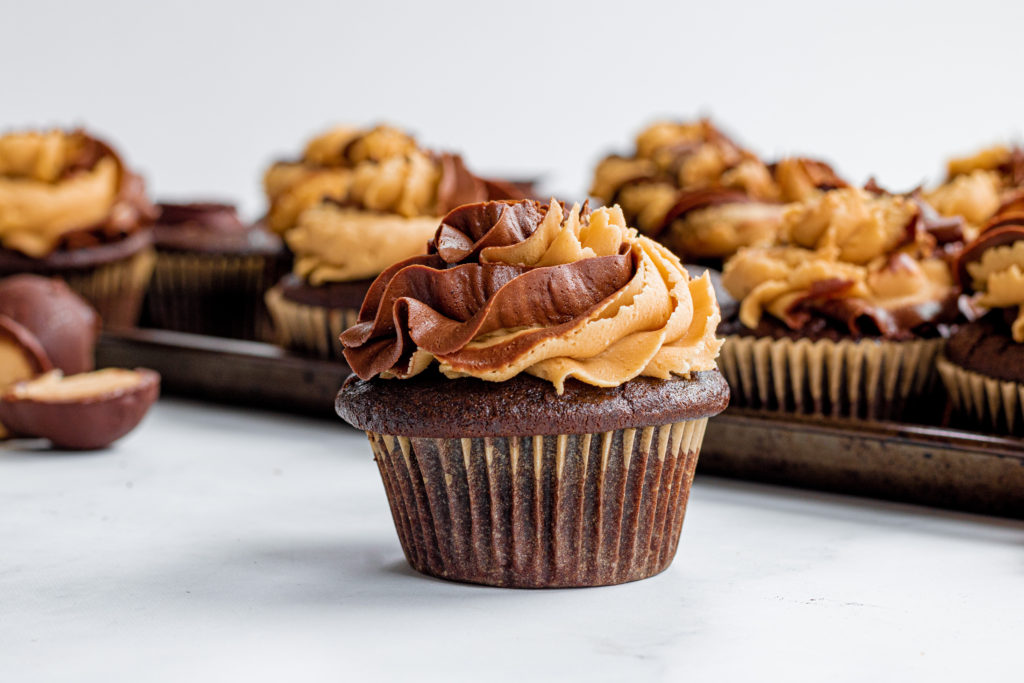
Food photography and styling by Amelia Farber


2 Comments
Pingback:
Pingback: